Patchwork animals. Learning patchwork for beginners. Simple patterns for connecting pieces of fabric for beginners
Currently, a very popular type of needlework is patchwork. You can beautifully and easily sew blankets, pillows, bags and other interesting and necessary things for the home using this technique. A patchwork sewing pattern will help you make an exclusive model. You can take it from this article or come up with it yourself.
What is patchwork?
Translated into English it is called patchwork. In this type of needlework, leftovers and scraps of fabric are used to create a design, something like a mosaic.
Using your imagination, you can create fancy patterns and ornaments. The patchwork technique and patterns were known to our mothers and grandmothers. Then it was used as a means of saving money. Nowadays, craftswomen can buy ready-made sets with a selection of fabrics by color.
The use of patchwork techniques is possible even when sewing clothes. For example, you can make an original skirt or sundress in a rustic style. To make the product look harmonious, you need to sort the flaps. To do this, it is enough to divide them into groups: warm and cold shades. And of course, knowledge won’t hurt, then your item will certainly be beautiful and interesting.
Tools for making patchwork
If a master takes his first steps in this type of needlework, then he will need a patchwork pattern. You can come up with it yourself and draw it on paper or on the computer. Or you can take a peek from experienced needlewomen.
You will also need a sewing machine, scissors, cardboard for templates, and a pencil. If you are planning a small product, you can sew it by hand. Next you need to collect all the scraps you have at home, you can use old clothes. Select pieces that are more similar in color, cut the parts according to your sketches and start connecting them. In this article about patchwork sewing, patterns, photos and descriptions are presented below.
"Arable land"
This patchwork pattern is similar to the furrows in a plowed field. To emphasize the dynamics of the stripes, you need to choose fabrics that are similar in color. You can use material with a small flower or checkered pattern. This type of sewing made from satin ribbons will look beautiful if you alternate the front side with the back side.
To work, a square of the required size is cut out and then divided into three sections, each of which is cut into five parallel strips. Fabric parts are cut out according to a template. The strips for each section are sewn separately and must be ironed. The individual pieces are joined together clockwise, starting with the top piece. From ready-made squares you can sew a pillowcase for a pillow, a throw for an armchair or sofa.
Chess pattern
To make this pattern you need two fabrics. You can cut small squares and sew them together, but there is an easier way. This patchwork pattern will show you how to do it faster and easier.

The fabric is cut into strips of equal width. Then they are sewn together, alternating in color. Then the fabric needs to be cut crosswise, not forgetting to leave seam allowances. Having laid out the strips in such a way as to form a checkerboard pattern, the craftsman must sew them together with a transverse seam.
"Granny's Honeycomb"
This pattern is so called because it is assembled from hexagons. Its assembly scheme is simple: cardboard templates are made according to the number of parts. The cardboard should be of medium thickness and not too hard. The pattern is then placed on the wrong side of the fabric and cut out, leaving seam allowances. They are folded and pulled together along the edge with thread so that the fabric fits tightly around the template. When all the hexagons are ready, they are folded right sides down, towards each other, and sewn by hand with a blind stitch. Afterwards, the cardboard is removed, the seams are ironed, and the finished fabric is sewn with the lining. The work is painstaking and manual, but the canvas turns out very beautiful; it is used to decorate pillows, napkins and tablecloths.
Crazy technique
This technique has another name - “crazy shreds”. This is due to the fact that, as a rule, there is no patchwork pattern for this type of stitching.

A triangle or trapezoid is sewn into the square in the center, and then various strips and figures of arbitrary shape are sewn around it. You can also use non-standard applications. You can use lace, beads and buttons to decorate and disguise seams. Even a novice needlewoman can make such patchwork beautifully and easily.
Knitted patchwork
Naturally, every knitting lover has a lot of unnecessary balls. You can make many squares from them and join them together to make a blanket or blanket.

Unlike previous techniques, the squares are not sewn together, but crocheted together. Most often, this type of patchwork is used in the manufacture of blankets, bags and even slippers. This patchwork pattern can be made mixed, using both fabric and knitting. To do this, take threads of a similar color to the fabric and tie them around pieces of fabric.
- a handicraft that is gaining amazing popularity, based on creating a holistic composition from multi-colored scraps of fabric. They are connected to each other by hand sewing or by machine, forming designs, patterns or colorful designs that decorate various household items. This is a difficult process that requires diligence and taste. But the result is worth it!
Where can patchwork design and hand sewing be used in the manufacture of home textiles?
Needlewomen, craftsmen from the hand-made category and simply zealous housewives who are not used to throwing away trimmings, scraps and other “waste” after sewing will find somewhere to use them.
Reasonable thrift and the ability to use patchwork and other techniques for hand-decorating home textiles will help you build your own business.Some people make bedspreads from colored and variegated scraps, sew children's blankets, while others are closer to creating original textile bags and creative panels.


Handicrafts and a creative approach to stylizing home textiles will help you create original items for a comfortable home.
 Pattern bed headboard
It is practical, profitable, and will allow you to make original gifts for your friends, relatives and friends.
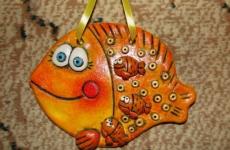
 Children's soft toy made from scraps
Patchwork is very beneficial for developing your own business.
In this direction:
- master all the subtleties and techniques of manual decoration, while simultaneously doing your main job;
- set up a workshop by selecting a corner in your apartment or private house;
- start searching for potential clients via the Internet.
 Extravagant accessories for girls using patchwork technique

 Patchwork pillows
By combining a creative approach, creativity and business to organize their own business, any woman or girl will be able to become financially independent. Here it is important to competently prepare a business plan for patchwork needlework, calculate how profitable it is, and also consider your activities for the future. Start a business without starting capital and create your brand.
 Patchwork is an ideal way of self-realization
Patchwork decor in the interior looks very organic not only in an ethno style, but also in a romantic one, where the owners of the home want to create a special atmosphere of comfort and a friendly atmosphere.
We invite you to familiarize yourself with original ideas for practicing patchwork, which you can involve your children and relatives in.
 Patchwork is a chance for business development
Having learned to build harmonious relationships with your potential and actual clients, it will not be difficult to promote your business, over time, from a corner for handicrafts, to create a workshop and even an atelier.
Patchwork as a business has a number of advantagesTo do this, you will not have to allocate amounts that will be spent monthly on:
- Direct costs (with purchase price).
- Taxes and wages.
- Fixed costs per month (room rental).
- Unjustified payments and expenses.
- Investment costs (to purchase the necessary funds).
 Patchwork Starter Kit
Having scraps, threads and needles available, you can build the basis for a profitable business with your own hands. Thoughtful strategies and the proposed action plan in the table will help with this.
Features of textile crafts: it is proposed to make everything with your own hands to stylize the interior
It is necessary to choose the simplest technique, then patchwork for beginners will not seem as complicated as it is used in the manufacture of quilted products - potholders, blankets and bedspreads.


Products made from patches most often feature repeating prints. These can be shaped blocks or individual simple elements (stripes, squares, triangles, polygonal shapes from the mosaic category). Repeating prints are made up of specific parts that are pre-cut.
Particular precision of dimensions is observed so as not to disturb the harmony of the created motif. When cutting out the components (flaps), this procedure will take more time compared to the subsequent operations - assembly and sewing.

Therefore, before you begin assembling the ornament: it is necessary to accurately cut; For each block, strictly adhere to the parameters; Carefully and manually control the dimensional accuracy (up to 1 mm) in order to avoid distortion in the assembled fabric.
Important!
Quick work in cutting “by eye” is not appropriate!
Thoughtlessness and haste will only lead to the fact that individual fragments and blocks cannot be combined, and the fabric will only be cut in vain.
Why do you need patterns in patchwork?
If you start using the patchwork technique and need to create colored or textured blocks, then for this you will need to prepare a special template that will help you cut out small details faster. It is from small elements with certain sizes and configurations that blocks are formed.
 Patchwork template - an indispensable assistant
The template is prepared for the part taking into account seam allowances. If you have not purchased a special ruler for patchwork, then you will have to use a template, and the seam allowance is usually set to one size from 5 to 7 mm. The template for working with patterns is conveniently made of cardboard or plastic.

In the West, specially made templates are sold to professional quilters, whose craft includes not only simple patchwork and patchwork, but also quilting. To develop your own business or hobby, use quilting.

 Incredibly beautiful quilting
This technique combines patchwork with appliqué and embroidery. It is recommended to use it when styling decorative interior elements - panels, appliqués, ribbon embroidery.
Quilting or patchwork - for making home textiles and styling interior items
Representing a patchwork mosaic of textiles, quilling and patchwork techniques differ significantly from each other. By stitching through two pieces of textile to create a quilted base, the quilting technique has wadding or batting in the middle of the sewing. To do this, you will need a sewing machine and, unlike patchwork, quilting allows you to form original quilted and three-dimensional patterns on textiles.
 You can't do quilting without a sewing machine
It looks very impressive, and based on this technique, it is proposed to make: blankets, pillows, holiday lunch mats, textile bags, blocks for storing things or children's toys, household containers for storing items from the wardrobe or accessories.
Upgrading old and worn denim items is ideal for these two techniques. In the house there are a dozen out-of-fashion models of jeans, jackets, skirts, and sundresses. Sometimes it’s a pity to throw it away and you don’t know where to use your old jeans? But this is ideal for sewing fashionable things in the boho style.

Exquisite bohemian style combined with free hippie will help:
- cut out beautifully decorated vests and skirts;
- create, using quilting and crazy techniques, spectacular textile handbags with patterned stitching;
- as an additional decor, in combination with a denim base, use fur, lace, embroidery, which are appropriate in ethnic and country style.
If this is in an interior characterized by geometric prints, ethnic patterns, a variety of colors, spectacular ornaments, modern materials, then use patchwork upholstery for soft armchairs, styling ottomans and couches. Patchwork for home
Patchwork pillow
Admiration for patchwork and quilting has long excited the minds of needlewomen, but not everyone decides to take such a serious step, because this type of fabric art is quite labor-intensive, requiring patience and perseverance, as well as a good sense of color and shape. Several schemes are described in this article.
This unusual word refers to a type of needlework based on sewing small (or not so small) pieces of fabric in a special way, during which a pattern is formed from these pieces, selected according to texture, color and shape. Loosely translated, patchwork is sewing, an entire art that combines the skills of sewing, design, geometry and drawing. During the sewing process, experienced craftsmen combine the pieces into various geometric patterns and patchwork patterns, forming a complex pattern structure. Products of various sizes are created: from small wallets to carpets and padding polyester blankets.
How to choose fabric?
You can use any fabric for patchwork, but for beginners it is better to use chintz, teak, and cotton: they practically do not deform and hold their shape well when sewing and washing. Also, the color schemes of these fabrics are extremely diverse, so choosing the necessary colors will not be difficult even for an inexperienced student.
If you plan to sew a blanket in a patchwork style, you can use old trousers, jeans, warm shirts and other unnecessary things to assemble fabric pieces. This is one of the features of patchwork - it gives a second life to old things, turning them into stunning handmade works.
If old things are not enough, then for dense large items you can use drape or gabardine, wool or velor, corduroy and other fabrics that suit your taste.
Patchwork for beginners
The “quick square” pattern is considered the simplest and most understandable for craftswomen taking their first steps in patchwork: the fabric is cut into squares of the same size, sewn into strips along the width of the product, which in turn are sewn along their length, forming a canvas. The originality of this scheme lies in the color scheme: the fabric for the patchwork is chosen to be bright, with various small patterns. Children's patchwork blankets sewn step by step using this pattern look very impressive.

The pattern pattern in the “Chess” patchwork is also quite simple, moreover, it uses only two shades: for example, red flowers on a yellow background and yellow flowers on red. From squares of the same size, a kind of chessboard is formed, that is, pieces of fabric alternately replace each other with a sideways shift of one square in the next row.
Stack-n-Whack technique for beginners
Schemes of templates and patterns in patchwork have several levels of complexity, but you should start with the simplest ones in order to get the hang of it and understand the principle of connecting parts. “Stack-and-wack” is considered not a banal, but rather simple patchwork pattern. The pattern consists of five parts, which together look like part of a children's kaleidoscope. The blocks are cut out quite simply: the selected multi-colored fabric is divided according to the color scheme into several piles: 4-5 will be enough. Each section should have the same number of segments similar in color: four or five. Next, all the stacks are cut into identical squares, for example, with a side length of 45 cm, and each of them is cut according to a template.

Then the pieces of the kaleidoscope are sorted so that in each department there are different colors for each part of one template; it is important not to confuse the colors so that the finished product has a harmonious color scheme.
Simple patterns for connecting pieces of fabric for beginners
The patchwork patterns described below are the most common, due to their simplicity, accessibility and uncomplicated geometry of the pattern, because in every art (even such an unusual one) there must be harmony of form, color and style:
- “Hut” or “log hut”, “block house” - this is the name of the method of connecting strips of fabric in the form of a log house or in a spiral around a central square or rectangle, sometimes with an emphasis in one direction (corner)
- “Watercolor”: in this patchwork pattern there is nothing special, the main idea is in color: stripes or squares are created from smaller parts of the same shape and then grouped by color, building a specific pattern
- “Strips in a row”: the name speaks for itself - a canvas and a specific pattern are formed from strips of various lengths and widths.
- "Magic Triangle" - This pattern is considered one of the most popular among both beginners and experienced quilters, as it has a unique shape that can easily be combined into more complex patterns by mixing and matching different colors. Quite a lot of complex patterns, patterns and patterns in patchwork are built on the basis of a triangle.
On the basis of such simple patterns, you can build quite complex compositions, which you should learn to use in products of different sizes and purposes in order to gain confidence in connecting pieces of fabric of different sizes and shapes to obtain the required patchwork pattern. Ideas for practicing skills:
pillowcase for baby pillow;
blanket or blanket for picnics;
oven mitts for the kitchen;
shopping bag;
"Quick square"
This scheme is ideal if you are short on time, but want to create something unique and unusual. Sometimes it is called the “Russian square”. It is cut out of three stripes, and two of them (each) are half the width of the third.
Two narrow strips are sewn along the entire length into one wide one, fold the resulting part with a third wide strip and stitch on both sides: you get a fabric “tunnel”.

Iron the seams and use a square-ruler to divide into triangle segments, cutting the workpiece at an angle of 45 degrees in two directions. As a result, you will get rhombuses (squares) of two types: the bottom triangle will always be the same color, and the top will be divided into two sectors: a small triangle and a trapezoid, which will replace each other in color. From these blanks you can create quite a few different patterns, combining them in different ways:

The works of the masters, made using the popular patchwork technique, amaze and delight. Small multi-colored scraps of needlewomen turn into exquisite household items and real objects of art: potholders, pillows, handbags, blankets, sundresses and even entire paintings. However, every master was once a beginner. Where to start to master patchwork sewing?

For this:
- The simplest geometric shapes are drawn on cardboard: squares, triangles - it depends on what shape the blanks for patchwork will be. This will be the stitching line.
- An additional 5 mm (for cotton fabrics) or 10 mm (for silk and satin) is set aside around the perimeter for seam allowance.
- The template is cut along the allowance line, and then a hole is made in it along the stitching line.
Templates with slots are convenient not only because they allow you to mark all the pattern lines on the fabric. Thanks to the through hole, you can see which pattern will be captured by the flap, so you can combine patterns beautifully.
If you want to purchase ready-made templates, choose ones made of transparent plastic. They are also useful for tracing the edges of a design on fabric.
Patchwork: patterns for beginners
You should not immediately, without prior preparation, start chaotically stitching the edges of the patches. The works of experienced craftswomen only at first glance seem to be sewn together from parts in a random sequence. Take a closer look and you will see a clear system of placement of all elements. Therefore, a beginner in patchwork cannot do without a work diagram, which will serve as a detailed plan for future sewing. It is convenient to do it on graph paper, marking and numbering all the elements.

These instructions will be laid out step by step:
- Sequence of connecting parts;
- Their sizes;
- Color combinations.
By devoting a little time to drawing up a diagram, you will save hours in the future that would have been spent on the painful selection of a scrap of the desired color, and you will also immediately calculate the amount of material needed.
Practice on simple and small patterns, for example, for potholders. Divide a 20 x 20 cm square into several simple shapes: rectangles, triangles, and practice creating color combinations.
Potholder patchwork technique: master class
A great way to get into quilting is by making potholders for the kitchen. This is a thing that is useful in every home. In addition, since the product is small in size, it can be sewn from narrow scraps, and the work is completed quite quickly.
You will learn how to make a bright bedspread using the patchwork technique in this article:
To sew using the patchwork technique, you will need:
- Multi-colored shreds of different sizes;
- A piece of non-woven or cotton measuring 20 x 20 cm;
- A piece of drape measuring 20 x 20 cm;
- Braid or ribbon 90 cm long;
- Ruler;
- Scissors;
- Pencil;
- Iron;
- Sewing machine;
- Threads, needles, pins;
- Paper for the diagram.

We carry out the work in the following sequence:
- We draw up a sewing pattern on paper. If the tack strips are narrow, it is convenient to make a pattern from rectangles of different lengths, laid out in a spiral. In this case, the central element will be a small square.
- We transfer the developed scheme to non-woven fabric, numbering the elements on it.
- We start sewing from the center. We pin the first element to the non-woven fabric and sew it on with a machine.
- We apply the next flap to the previous one with the front side so that the stitching lines meet and stitch one.
- Straighten the sewn flap and smooth the seams with an iron.
- We continue to sheathe the parts superimposed on each other in this way.
- We attach the workpiece to a piece of thick drape.
- We make the edging from the tape, decorating the ends with a loop.
Having mastered such a potholder, it will not be difficult to make other practical and beautiful household items for the kitchen using the patchwork technique. Any housewife will need comfortable oven mitts, bright aprons and aprons.
Products made using the patchwork technique will be appropriate not only in the kitchen. Decorative pillowcases for sofa cushions made in this style look very original in the living room. More experienced needlewomen decorate bedrooms with bedspreads sewn from rags.
Beautiful patchwork for beginners (video)
If you have perseverance and artistic taste, mastering patchwork will be an easy task. As you can easily see, you can create original and beautiful elements from almost nothing, and they will delight you for many years.
Patchwork for beginners (photo)


![]()


You always want to create coziness in your apartment and express yourself through interior details. And, if you are also a creative person, then you can do it yourself. For example, there is a patchwork technique that allows you to create masterpieces from pieces of fabric. The name is English, but in Russia it is called patchwork. This type of technology has been known for a very long time, and archaeologists and scientists have found products created using this method all over the world, both in America and in Asian countries. I think that this was primarily due to the high cost of fabric in ancient times, so they took care of every scrap and tried to use it functionally.
In Russia, this method has also become widespread among peasants due to the high cost of fabric. The products were initially sewn together in a chaotic way, but gradually patterns began to be invented. Today we will look at patchwork for beginners so that you can repeat it beautifully and easily.
I have seen many beautiful works using this technique: blankets, pillows, potholders, bedspreads. When a sofa bedspread combines fabrics and colors of the overall color tone of the interior, it looks simply wonderful. Housewives have come up with a huge variety of schemes and templates, which can be very simple or quite complex and labor-intensive. But the effect is always amazing.

This technique is suitable for any interior style, but for rustic styles it is simply irreplaceable.
This technique is not at all as complicated as it might seem at first glance, but for a beginning craftswoman, you first need to gain experience and get better at it, so there are a few tips that will help you enjoy the process and not tire you out.

First, you need to prepare your workplace; the fabric should lie flat on the surface. This will allow you to cut and mark the lines evenly. Also, the fabric must be well ironed before work! This is very important, otherwise creases and unevenness may result.
Secondly, if you are just starting your activity in this direction, then take larger pieces, it will be easier for you. I understand that you may want to immediately repeat some drawing, but start with simple patterns just to get your hands on and achieve neat drawings.
Thirdly, always maintain an even cut, this will also give accuracy to your work.
To prevent parts from moving out, use pins.
Try to sew so that the machine foot is flush with the edge of the part. This allowance will be approximately 6 mm.
If you started making seam allowances of 6 mm, then adhere to this figure throughout the entire work. Otherwise, the drawing may turn out unclear or uneven.
Patchwork technique for beginners: step-by-step photos
Of course, to start you need to first find where to start. Pardon the pun, but you can often find instructions for beginners that will bring tears to your eyes. Today I will offer two of the simplest techniques that everyone can do.
The main thing is to do everything carefully and then you can decorate the interior of the nursery, for example, with such a cute blanket.
There are many techniques in patchwork, but we will look at two: the well and Jacob's ladder.
Patchwork technique “Well”
The drawings created using this technique are very beautiful in two-color design. The diagram is shown in the figure below.
 Scheme "Well"
 You can use any fabric, but for a beginning craftswoman it is better to use cotton. It will not crumble, there is no need to pick up the pile, etc.
 “Well” technique
 We will need:
- Base – 20*20cm
- 2 multi-colored stripes, 3 cm wide, up to 1 meter long
- Square 4*4 cm
Before work, iron all the details well.
- On a backing made of cotton fabric, we find the middle by connecting two diagonals.

- Next, we place a 4*4 cm square in the middle, so that the corners of the square coincide with the lines.

- We sew only one side. Important! The edge of the fabric matches the edge of the foot.

- Place the strip with the front side facing the square and stitch. All edges must match perfectly.

- Thus, we have already made two seams.
- Now cut the strip exactly along the lines.

7. Bend the stitched patch with the front side up.

8. Place the next red strip with the right side facing inward and stitch.

9. Cut the strip again and bend the sewn end.

10. We also sew and cut off the fourth side of the square.

11. Repeat the same steps with a strip of a different color.

12. Alternate the strips in a circle until the base runs out.
The beautiful drawing is ready, the squares can be alternated.
To get a harmonious combination of colors, when choosing a fabric tone, be guided by. The tones should be the same saturation and the same lightness. I already wrote about the color wheel, although it applies to the interior, but it works with any color selection. Therefore, I invite you to read it.
Patchwork technique “Jacob’s Ladder”
This pattern also looks unusual and, despite its simplicity, is easy to do. The drawing itself didn’t manage to become an eyesore, so let’s take a look at it as well.

The photo shows the blog Jacob's Ladder, which consists of two bases: one of squares, the other of triangles.
 Jacob's Ladder technique
 You will need: 5 blocks with 2*2 squares, 4 blocks of triangles squares. Highlighted in the photo.

First, we make blocks of 2*2 squares.
To do this, we will need two strips, 7 cm wide. We place one on top of the other with the front side inward and sew at a distance of 6 mm from the edge.
 Making a blank from squares
 You need to iron the resulting part.

We make two such stitched strips, then place them on top of each other with the right sides inward, aligning the edges. And cut strips 7 cm wide.

Without separating the strips, we immediately sew them at a distance of 6 mm from the edge.

We iron the blanks and make 4 more such parts.

Now let's start creating a block of triangles. Take 2 squares with sides 13.5*13.5 cm.

On a light square you need to draw a diagonal.

Now we fold the two parts with the right sides inward and fasten them with pins.
Now we sew two strips, at a distance of 6 mm from the diagonal on each side.

When laying out the block, you need to carefully ensure that all the squares from the triangle with the bright side facing inward.

After you have laid out the blanks, we begin to sew them together.
I think you should get both drawings right the first time.
Schemes and templates for patchwork sewing
I’ll also give you a few diagrams, and, most importantly, I’ll bring to your attention the beautiful works of craftswomen that will decorate any apartment. In general, this is our goal, right?
Let's consider the first scheme using triangles. The sequence is shown in numbers.

The finished result can be seen in the figure. This scheme is for those who have already gotten their hands on it.

The following scheme, on the contrary, is very simple and easy. It consists of connecting triangles in a certain sequence, as in the figure.

An example of the finished product can be seen in the photo. With the right combination of colors, you can always create a very beautiful product!

Another interesting version of the drawing is shown in the picture below.

Simply connecting squares can also make beautiful things, such as another version of a baby blanket.

I think that you can start with the simplest techniques and, if you have imagination, make very beautiful and functional things; below we will consider a few ideas for inspiration.
Patchwork Ideas for Beginners
I came across a lot of ideas for the nursery. Here you can make a kit for each child. Choose a color scheme for both girls and boys.
Another option for decorating a nursery is a set of pillows and blankets made using this technique.

Also in the bottom photo, an idea for a color scheme for patchwork.

Bright and interesting ideas can be implemented and please your kids. Every child will be delighted with such a set depicting their favorite characters.

But, moving away from the nursery, here are a few more ideas. For example, oven mitts.

Another option for a home or bathhouse can be seen in the bottom picture.

I think that these schemes are enough to get you started, and if you have ideas, then share them in the comments!