How to learn to felt clothes. Wet felting wool products for beginners
Felting wool is a very entertaining hobby with which you can create real masterpieces! How to learn this art from scratch and what you need to master the skill.
Handicraft is one of the main women's crafts. For some, it’s just a hobby, a way to meditate and relax the soul. And for some it is also a form of income (additional or main). Look on our website for publications about embroidery with beads and threads, crocheting and knitting, modeling from polymer clay, sewing and patchwork, beadwork, soap making, scrapbooking, quilling. But this article is dedicated to the warmest and fluffiest hobby - the technique of felting wool.
Felting wool is one of the most popular types of handicrafts. Like the mythical Phoenix bird, it was reborn from oblivion and, having flown around the entire globe, gave the craftswomen new opportunities for self-expression. Many felters were captivated by this marvelous material - sheep's wool - and called it “fluffy clay”. But it’s true that a wide variety of products are made from sheep’s “fur coats”. But first things first.
In search of the Golden Fleece: a little history
Several thousand years have passed since man tamed the wild ancestor of the modern sheep. And around the same time, women learned to felt coarse woolen cloth, which covered the floor and walls, and this is where the history of wool felting began.

Later they began to make tents, clothes and shoes from wool. The most popular ancient center of wool felting was the legendary city of Pompeii. His cloth was famous for its finest workmanship and extraordinary softness, worthy only of kings.
Wool was used everywhere, and amazing properties were attributed to it: in war, felt clothing warded off arrows and spears from a fighter, and healed the body from diseases. They did not forget to perpetuate the “sheepskin” in the myth of the prophetic ship “Argo”, which, under the leadership of Jason, set off on a long voyage for the Golden Fleece...
Fortunately, we do not need to sail far away to the thirtieth kingdom in order to buy a little (or maybe a lot) wool for needlework.
Main types of wool for felting
In the vastness of the CIS countries you can find 5 main types of wool for felting, which is presented in a wide variety of assortments in specialized stores for creativity or in online stores for needlewomen. This product can be bought even cheaper in Chinese online stores.

Wool curls shorn from Wensleydale sheep
- Sliver. This type of wool is a sliver that has gone through washing and primary cleaning. It can be light or dark (depending on the breed of sheep). Designed for dry and wet felting, suitable as the cheapest base for toys and paintings. Sometimes you come across dried plants and flowers in the sliver - a distant greeting from the steppe, where white sheep graze.
- Combed (unspun) ribbon. Cleaned, dyed or bleached wool that has gone a long way from clipped clumps to smooth, combed strands. This material can turn into a scarf, brooch, hat, toy, blouse, coat or boots...
The list goes on and on. “Trinity” wool and “Semenovskaya” wool are very popular in Russia, which is imported to Ukraine and other countries. The more expensive Australian merino "Wensleydale" is no less popular. As well as wool produced in England, Italy (mostly the most delicate “baby alpaca”) and Germany.
Another type of combed tape - multicolors(wool of different colors or shades of the same range) and blends (wool + mulberry silk). Want to felt a rainbow scarf? These sets are made especially for you!
IMPORTANT!!! Wool in combed ribbons is divided into categories: coarse (28-24 microns), semi-fine (24-18 microns), fine (18-14 microns). The finer the wool, the more expensive and convenient it is to work with. Do not use fine wool in combed strips for dry felting of toy bases, it is only suitable for final finishing.

- Carding. Beautiful multi-colored cotton wool - this is how this type of wool can be described. Very convenient for dry felting: thanks to its structure, there are no “bald patches” on the products, which so often spoil the appearance. In wet felting, carding is also very convenient: the product falls faster, and less effort and time are needed.
- Curls. They are perfect for doll hair, will successfully decorate felted items, can be easily dyed with vegetable dyes (for example, henna or batik)... This is a real treasure for creating designer and original items.
- Tips. They are mainly used for doll hair. Natural tips are very expensive, so only professional puppeteers can afford to purchase them.

Set for dry felting (filting): wool, needles, decor, brush
The modern felter has a few more secrets for creating unique products. We are talking about additional decor that transforms the product and makes it original. Most often used for wet felting:
- threads of viscose, silk, hemp, bamboo, linen (for creating beautiful watercolor stains);
- an Indian sari, which was skillfully torn into thin shreds in order to delight you and me with another opportunity to transform a felted product;
- boules or silkworm cocoons are useful for creating voluminous bulges on the product; they are also easy to dye with batik;
- silk scarves create unusual effects on products, and, painted with hot batik, they are indispensable for the most daring experiments;
- fabrics with a sparse texture for nuno-felting (silk, chiffon, sometimes gauze is used);
- thin silk ribbons, torn lengthwise, will save any product from being too “boring” and “correct”;
- delicate lace has always helped craftswomen to the rescue in the most hopeless situations, when there is simply no other decor at hand, but these same hands are “itching” to felt something;
- multi-colored skeletonized leaves have become a bestseller, because no felter can resist the beauty of nature itself, and skillfully felted leaves refresh the product in an autumnal way.
So, we’ve dealt with wool, now it’s time to talk about materials that make the felter’s work easier. Along the way we will get acquainted with wool felting techniques. And there are only two of them: “dry” and “wet”.
Wet felting: felting or nuno-felting
Felting(from the English felt - felt) and nuno-felting(from Japanese nuno - fabric) - the most ancient way of turning shapeless scraps of wool into neat felt boots, a carpet or a lampshade. What captivates beginners with the wet felting technique is the almost instant result. Agree that seeing the fruits of your labors after just half an hour of active work is much more pleasant than after many, many days.

Another house from Olga Artvanil
The technique itself has not changed over thousands of years: its main ally is water, preferably hot; “Nuno” appeared recently in Japan, when the inventive craftswomen of the Land of the Rising Sun first combined fabric and wool.

A nest house for a cat, made using the wet felting technique on a template, by German craftswoman Suzanne Karg
Remember the labels on new sweaters, they indicate the washing mode: “only by hand” and “only at 30 degrees”, and drying “only in a horizontal position”. We comply with these conditions so that the new item does not “shrink”. In felting, on the contrary, you need to felt the wool as tightly as possible until it becomes dense.

It’s just hard and time-consuming to wallow with water alone, so they come to the rescue:
- Soap(household, liquid or special with olive oil and glycerin). The water fluffs up each of the hairs, creating a herringbone effect. And the soap (alkaline) solution helps these “Christmas trees” cling to each other. Add mechanical movements with your hands, and you get felt.
- Spray, small sprayer, special watering can, bath sponge. All of the listed “helpers” serve one purpose - to properly moisturize the wool without leaving a dry place (otherwise the product will be felted unevenly). Which is better to use? There is no definite answer, since each craftswoman chooses the most affordable option. Although, the most convenient is a small 1-3 liter sprayer: it makes the work much easier.
- mosquito net. It is used for lathering the workpiece after the wool has been spread out and moistened, and for the initial felting of the upper layers. The mosquito net can be replaced with mesh fabric. IMPORTANT!!! The mosquito net should have small cells. During operation, you should lift it frequently to avoid sticking to the product.
- Orbital grinder/surface grinder(HSM or PShM). This unit was invented to level the floor during renovation work, but who forbids us to use force in the name of beauty?! With a “vibration grinder” the felting process is reduced to several hours (if you need to make a simple product, for example, a scarf or stole). There is no point in purchasing an overly expensive machine; a cheaper option is quite suitable for handicrafts. IMPORTANT!!! Do not use a PShM (VShM) at the initial stage of work! This can damage the layout of the coat, resulting in unsightly “bald spots.”
- Pimply (air bubble) film. The anti-stress film we all love has found its application in felting. Its air bubbles work like thousands of little fingers, turning the wool into a single product. It is better to buy such film not in handicraft stores, where its price is “slightly” inflated, but in construction supermarkets or stores for summer residents.
- Underlay for laminate. To felt a voluminous item, for example, a hat, mittens, felt boots or a house for your beloved pet, we need a template. Just cardboard will not work: you need a strong, durable and flexible material. Once again the construction department comes to the rescue! It is best to buy the cheapest transparent (foamed polymer) backing with a minimum width of 3 mm.
- Plastic pipes. However, for a simple felter, one pipe 1 m long and 5 cm in diameter is enough. What this device is needed for is for felting such large items as outerwear. The half-matted piece together with the template is wound onto a pipe, secured with a rope or cord (preferably synthetic) and rolled on bubble wrap (remember rolling out dough). These manipulations will help shrink the wool. IMPORTANT!!! For uniform shrinkage, it is necessary to “roll” the workpiece the same number of times, winding it alternately along and across.
- Washboard. It is used for the same purpose as a plastic pipe - to shrink the product. The only condition for its use is that all layers of wool must be well felted to each other.
- Bamboo mat. Typically, it is used together with a plastic pipe, wound over a wool blank. When making small products, you can do without a pipe. If purchasing such a mat is problematic, you can use any clean towel.
- Gloves and fingertips. To protect your hands from excess moisture and soap, you can use rubber fingertips and gloves of all types. It’s just that the most important sense in them is dulled – touch. If this method of protection is not to your taste, stock up on rich hand and nail cream. This is the best product for skin that is dry and degreased by soap.
- Wooden molds and blocks. These devices are designed specifically for shrinking hats, felt boots, slippers, and clothing. Some plastic shapes can be used for felting in the washing machine.

Dry felting: felting or felting
Felting (from German filz - felt) is a dry felting technique from wool, it was invented relatively recently. It is fundamentally different from “wet”, which means that it requires its own, special materials. The most important tool for felting is a needle. But not simple, but with notches.
They are the ones who mat or, to put it in professional language, fold the wool together. Felting needles are classified by appearance, and its number indicates its purpose. By the way, the smaller the needle number, the coarser and thicker it is.

Click on the picture to go to the tutorial on how to create this elephant
The best needles for felting are produced in Germany, the USA, and the UK. Chinese and domestic instruments are cheaper and significantly inferior in quality and, accordingly, in durability. Externally, the needle looks like a metal rod 7.8 cm long with a small L-shaped “tail” for fingers.
IMPORTANT!!! Do not buy needles with rubberized or plastic handles: they are expensive, break quickly, and you cannot replace the shaft. It is better to buy a wooden holder with one or more holes for needles.

Triangular
The most common and most versatile needles. The name suggests that their cross-section is similar to a triangle. The notches in these needles are staggered along the entire length of the working area. Designed for all types of work: forming the base for dolls and toys, felting wool, final finishing of the finished product, felting patterns and hair fibers.
Asterisks
Just like the triangular needles, these needles can do all kinds of work with greater efficiency. But their main purpose is grinding and final finishing of the finished product. Their cross section resembles a quadrangular star, the notches are arranged in a checkerboard pattern along the entire length of the working area.
Twisted
The working area of such needles is twisted along the axis, which makes it possible to perform final finishing of products (triangular needles) and initial “rough” work (star needles) without much effort.
Crowned
Crown needles have serifs located almost at the tip of the point. They are very convenient for rolling doll hair and patterns. All work takes place on the surface of the product, which means the wool will not be visible on the wrong side. These needles are also used for pressing patterns on woolen and felt clothes without the risk of ruining the reverse side.
Forks
These needles are for pinning hair only. Like crown ones, they work on the surface, but, thanks to the bifurcated working area, the wool fibers are fixed more firmly.
Reverse
If you want your cute, freshly felted animal to also become fluffy, work with a reverse barbed needle. The “reverse tooth” pushes the fur outward, creating a shaggy effect. By the way, these needles can be used to mix different shades of fur on the surface of an animal toy; to do this, it is enough to alternate working with a triangular or star-shaped needle and a reverse one.
IMPORTANT!!! When working with felting needles, you must be careful: the needle may prick your finger painfully (the wound inside will be torn). Be careful to ensure that the needle angle at the entry and exit points is the same when filing. Otherwise, the work area may break.
Types and sections of needles for felting

We wrote above that needles, regardless of cross-section and purpose, have numbers that correspond to working with a certain type of wool. Now is the time to say that:
№19 – the thickest and most durable needle. It is convenient to work with very coarse wool (sliver). Suitable for initial work. However, not every felter is able to cope with such “heavy artillery”.
№ 25 - slightly thinner than a No. 19 needle, it is much more convenient to work with. Used to form the basis for dolls and toys.
№32 – is considered a universal coarse needle. Also intended for initial work.
№34 - medium size needle. Suitable for creating the base of dolls, toys and balls for beads.
№36 – medium universal needle. It is chosen for felting the surface of the base of the toy, the initial stage of felting brooches on the frame, felting patterns and hair.
№38 – the most popular medium-sized needle. It is used for felting colored wool on toys, forming patterns on beads (also woolen), and felting hair for dolls.
№40 – a thin needle is intended for final finishing of the surface of toys, embossing elegant patterns.
№42 - a very thin needle. Used for finishing and sanding work.
№43 - super fine needle. Its purpose is to delicately polish the finished toy.
IMPORTANT!!! Do not use only one universal needle for felting large items. Firstly, this is impractical, and secondly, it will lead to rapid wear and breakage of the tool.
So, we have chosen the tools for felting, and we have also decided on the wool. The only thing missing is a work surface. It is needed to prevent needles from breaking on a hard table and to protect your hands from damage from the same needle. And wool, laid out on a special device, falls easier and more beautifully.
Quite often, beginning felters use thick foam rubber or sponges (bath or car sponges) as a working area - this is a cheaper option. Experienced craftswomen do not disdain them either. But the choice of professionals still falls on special brushes for dry felting.
The fact is that foam rubber wears out over time, crumbles and sometimes gets stuck in the product. The brush will last much longer. Many needlewomen are stopped by the price, but once they choose the largest brush in area, they will not exchange it for anything.
Play around and don't be a fool: where to start and how to make money on a new hobby
Felting wool, regardless of the method, is such a pleasant, warm, fluffy, soft needlework that it is impossible to distract yourself from it! Believe me, learning to felt is much easier than it seems!
For children of preschool and primary school age, pediatricians and speech therapists recommend wet felting (napkins, small pictures, beads). This felting technique for beginners is ideal because it is less traumatic for fingers, develops fine motor skills, teaches you how to work with color, and the end result is achieved quite quickly.
Some child psychologists who are passionate about this handicraft also practice felting bulky toys in their classes using the wet method, explaining that a small child does not prick the future animal with a needle, but constantly strokes it with his hands.

Quite often, beginning wool felting masters think about how to find their circle of clients and get not only pleasure from their favorite hobby, but also. How to achieve this?
Step 1. The surest way is to master the techniques perfectly and make your own changes. Come up with your own style, unlike the others.
Step 2. Participate in various competitions, fairs, exhibitions. And don't skimp on business cards! As they say, be more visible.
Step 3. Create your own website, blog, community on social networks. Active communication is encouraged.
Step 4. Invite beginners to master classes. Just don’t copy other people’s secrets, but come up with something of your own, add a twist.
Step 5. Sell products online abroad. This is very profitable, since Russian felted items are valued more expensive precisely because of the quality of workmanship. Overseas needlewomen nervously bite their nails...

Unfortunately, it is impossible to embrace the immensity. Therefore, for successful sales, choose your niche in felting. For example, create only animal toys with cute faces, or only dolls, or paintings... The larger your collection of felted products of the same type, the greater the choice, and demand will not be long in coming.
We wish you creative success! Go for it!

Author of the article: needlewoman, beauty and very nice girl - Olga Artvanil. If you liked her work, order a designer toy, decoration, painting, house for an animal, beret or something else warm, cozy and soft!

Do you want to talk about your hobby and show your work? We will be happy to publish interesting material and a link to your coordinates absolutely FREE!
And if you don't have a hobby yet, find one by checking out our other posts right now.
Wet felting is one of the traditional methods of making felt from wool, along with dry felting. This is a fairly simple technology and at the same time a very intuitive type of needlework, because... masters can never say exactly what the result will be. There are no absolute prescriptions or rules here, which allows you to even invent your own felting methods and technologies or remake already known ones to your liking.
Materials for wet felting technique
This technique is so named because it uses soapy water to felt the wool. Wet wool is easier to process and deform, and slippery soap allows the fibers to mix and tangle more easily due to reduced friction.
Wet felting arose in those countries where sheep farming was widespread, back in ancient times. There is even a biblical legend about the origin of this technique: on Noah’s Ark there was also room for sheep that lived in a small room during the voyage. The wool from the animals fell to the floor, became saturated with sea moisture, and the sheep also constantly trampled it with their hooves. After the animals left the ark, the first felted carpet in history was found on the floor.
Therefore, it is not difficult to understand that materials for wet felting are extremely simple. To make a flower, vase or handbag from felt, you will need only the simplest items and materials: - wool; - soap; - water; - a spray bottle with water; - a waterproof bedding for the product (rubber mat, film, etc.); - mesh (old tulle, mosquito net or under plaster); - cellophane gloves for hands so that your skin does not become rough; - rolling pin for dough; - transparent stationery tape; - terry towel.
Felting wool is divided into several types - thin, semi-fine and combed. From thin material you can make scarves and other elegant things - skirts, capes, flowers, jewelry. Semi-fine wool is thicker and is used to make hats and bags. The combed tape is very coarse, it is difficult to felt, it is better to add it little by little when felting dense products that must be especially wear-resistant, for example, slippers, felt boots, etc.
Initially, the coat is white or slightly gray. To obtain other colors, it must be redyed using wool dyes. For beginning needlewomen, it is best to paint a piece of felt in one color, and if you already have experience, you can try multi-color painting.
Wet felting technology - master class
Wet felting technology is impossible without a properly prepared soap solution. To do this, grate a bar of soap and pour boiling water (2 liters). Then mix the mixture thoroughly until the soap is completely dissolved. Then let the mixture sit for 2 hours until it thickens completely. Now the soap solution is ready for use.
If you don’t have time to make a soap solution, you can use ready-made liquid soap. The main thing is that it is without additional cosmetic ingredients (cream, balm, etc.)
Now you can proceed directly to the felting process itself. To do this, take a waterproof mat and mark the outline of your product on it using masking tape. According to needlewomen, packaging film with bubbles is best suited as a bedding. It should be placed with the pimples facing up.
Please note that wool will shrink by approximately 20% as it dries. Take this fact into account immediately when calculating the dimensions of your future product.
Place the wool on the prepared bedding. First of all, line the background of the picture. This will be your base layer. Then, dividing the wool into thin strands, form a pattern. The strands must be overlapped so that there are no holes, gaps, or too thin places. Remember that after processing the wool will shrink, and the thickness of the finished product will be 3-4 times less than during the wool laying process.
When the design is completely laid out, wet your canvas with water from a spray bottle. Do this very carefully, otherwise your drawing may move or deform. If excess water appears (a puddle), you can simply blot it with a towel. The next stage of work is wetting the wool with a soap solution. To do this, place a mosquito net (or tulle) on your canvas and moisten it with a previously prepared soap solution. Now blot the fabric with your hands, helping the soap to thoroughly saturate the wool. Then iron it with a wooden rolling pin. Remove excess water again if necessary.
Now the stage of direct felting of wool has come. Wear cellophane gloves on your hands and rub the cloth in different directions. You need gloves, first of all, to better glide your hands over the material, and only then to protect your skin from external influences. It is important to ensure that the canvas is sufficiently saturated with soapy water at all times. Each section of wool should be rubbed approximately 100 times - this is the “golden rule” of wet felting. Of course, you shouldn't count literally. When the mesh begins to easily move away from the material, and the pattern does not shift, remove the mesh from the canvas and continue to felt with your hands, turning the product over to the wrong side. The main thing is to make sure that the canvas is sufficiently moistened with soapy water and soap.
The necessary items for wet felting are wool, water and soap, and the only tools you need are your hands. Additional materials that will definitely come in handy are a rubber corrugated mat, a bamboo napkin and packaging film. You will also need a spray bottle with water and a mosquito net, under plaster or old tulle, a wooden rolling pin, a terry towel and tape. Rubber gloves are optional, but the skin on your hands will likely appreciate them.
Fine merino wool is suitable for scarves and dresses, it is very soft and light. Semi-thin is coarser, used for making hats and bags, and combed tape is the coarsest and hardest to work with; it is best to add it little by little when making products from other types of wool.
A soap solution is made by rubbing a piece of soap on a coarse grater and pouring two liters of boiling water over it. Everything is mixed until the soap is completely dissolved, then it is infused for about two hours until it thickens, after which the solution is ready for use. Suitable for wet felting and ready-made liquid soap. A bedding is spread on the table, using packaging film with pimples, in which wool fibers will definitely not get stuck. In order to determine the dimensions of the future product, its outlines on the film are outlined with strips of tape.
Wool is placed on the finished bedding, first the main layer - the base layer, then the background, on top of which - the pattern. The wool is laid in thin strands so that there are no gaps - overlapping, and the layers are laid perpendicular to each other. The thickness should be the same in all areas, but due to shrinkage, it should be 3-4 times greater than the expected thickness of the finished product. The finished wool is wetted from a spray bottle carefully so that the pattern does not move. The wet wool is carefully covered with a net on top and moistened with a soap solution more thoroughly. When soaking the wool, it is actively blotted with your hands, you can roll it with a rolling pin, but carefully so as not to displace the pattern or make holes. Excess water is blotted with a terry towel.
The wet felting technique is very simple - the wool is gently rubbed with your hands in different directions. Hands in cellophane gloves are protected from prolonged exposure to soap and glide better; the likelihood of getting caught on something is very low. As for the time and number of rubbings, there is a rule that states that for felting you need to iron each area a hundred times.
The readiness of the felt is checked by pulling the wool upward. If the entire fabric rises, and not individual pieces and strands, the product can be considered matted. If the mesh begins to move away from the fabric, but the wool does not move, you can remove the mesh and, turning the fabric over, felt it from the wrong side. Well-wetted fabric can be felted without a net. The fabric is rinsed in the shower in warm water to wash away any remaining soap solution. Excessively hot or cold water may cause the product to shrink, so the temperature must be carefully regulated. The finished washed felt should not be twisted; it is better to let it drain on a wire rack.
Felting (felting, felting) belongs to ancient varieties of needlework. Felted wool products created by craftswomen from all over the country sell like hot cakes in stores. Step-by-step wool felting for beginners allows you to make unique items. Felting is the creation of wool crafts by interlocking and interweaving fibers using several methods. The modern art of felting includes: wet felting, dry felting, nanofeltting.
Features of wool felting
Before you begin step-by-step wool felting for beginners, you need to figure out what you will need for this fun artistic process. The first thing you need to order is any natural wool. The material is available on the shelves of specialized department stores and in online stores. What raw materials and tools are best to purchase?
Crafts are often made from coarse sheep or camel wool. As a base for the product, it is recommended to buy sliver - combed sheep wool without awns. The stuffing, for example, of cat toys or slippers is often flocked, while merino is suitable for decorating objects. Felting cannot be done with a needle. Special tools come in different sizes (thin, thick and medium), and different cross-sectional shapes (crown, triangular, star-shaped). So, we purchase a wool felting kit for beginners and move on to master classes.
Master classes on felting wool with a step-by-step description of the work
This section is for those beginning craftswomen who want to try their hand at felting. Let's find out what the dry felting method is, wet felting and felting using a washing machine. A detailed study of the master classes will allow you to make products of absolutely any level of complexity: from small decorative parts to clothing items.
Dry felting technique for beginners
For step-by-step felting from wool for beginners using the dry method, you need unspun wool (the best option is carding) and special needles with notches. Dry felting is the entangling of material fibers with each other, as a result of which they are transformed into felt. Felting using this method is carried out using needles with a triangular and star-shaped section. We prepare wool, needles for felting, a thick piece of foam rubber and move on to practice. Further:

- We put the material on the foam rubber and tangle it with a needle. The base of the craft is sometimes made of padding polyester, covered with wool on top.
- When working with needles, you should be as careful as possible because they are sharp. The needle must be held perpendicular to the craft. The process of creating any thing from felt begins with the use of a thick needle, which gradually changes to a thin one.
- Defects in the form of unevenness on an artistic object are smoothed out using additional raw materials.
- Dry felting is voluminous souvenirs (badges, keychains), accessories (wallet, bag, book bindings), coats made of felted wool, hats, felt boots, and so on.
Wet felting
Wet felting of wool on gauze is done using a warm soap solution (some replace it with liquid soap). The material is laid out in pieces on gauze, according to a pre-selected pattern. The mixture is made like this: grind a couple of pieces of soap on a grater, pour two liters of hot water into the shavings, mix well, wait 2 hours until the solution becomes thick. Next step by step:

- We spread the oilcloth on the floor or other convenient flat surface. We put gauze on top.
- Then we lay out the base, the background and the selected pattern on it.
- The threads are applied crosswise in stripes. We make sure that there are no holes left in the canvas, and that the layers of material lie perpendicular. Their thickness should be the same.
- When the material has already been laid out in accordance with the drawing, you need to sprinkle water on the leg, cover it with a nylon cloth and lubricate it with a soap solution. Remove excess liquid with a paper napkin.
- The next stage is felting wool into paintings, panels, toys or jewelry (brooches, beads). Wet felting of any product involves rubbing the fabric by hand in different directions.
Felting in the washing machine
Felting using a washer is the easiest and simplest method of creating items from felted wool. We will need dense forms for deboning, which are wrapped with wool hairs and placed in nylon golf (or part of ordinary nylon tights without holes, arrows). Let's proceed directly to creating felted crafts:

- The workpiece must be placed in a washing bag and placed in the washing machine. Pour detergent for washing woolen items into a special recess and set the cycle without soaking and drying. To achieve optimal results, set the temperature to 50 degrees.
- When the machine finishes the washing process, we take out our finished felted item. If you decide to use a form for deboning, it is better to remove it from the workpiece using scissors.
Where to buy and how much do felting kits and wool cost?
For every beginning needlewoman who has decided to try herself in the art of felting, information on where to purchase all the necessary materials and tools for felting will always be useful. Below are tables showing points of sale of felting kits and wool in Moscow and St. Petersburg. You will find everything you need for felting in the stores presented in the tables.
| Name of shop | Cost of goods, rub. |
|
| "Felt" | Moscow, Malomoskovskaya street 10 | From 30 to 800 |
| "Needle" | Moscow, Academician Yangelya street, building 6, building 1, shopping center "Kalach"; Varshavskoe highway, house 32; Vernadsky Ave., building 39. St. Petersburg, st. Baikonurskaya, house 14, lit. And the shopping and entertainment complex "Continent". | From 150 to 750 |
| "Three Reels" | Moscow, Dmitrovskoe highway, building 157, building 5 | From 100 to 700 |
| m. Lyublino, st. Krasnodarskaya house 57, building 3 | From 50 to 800 |
Online stores
| Product names | price, rub. |
|
| vremya-rukodelia | Trinity wool for felting Semenovskaya factory Felting tools | From 55 to 150 |
| Material Tools | From 80 to 900 |
|
Dry felting of wool, felting, felting is a technique for creating toys, shoes, clothes and various decorative items from unspun wool. This art allows you to display all the fantasies of needlewomen.
For beginners, it is important to know exactly what tools are needed, what types of wool to use in the technique of felting toys, what varieties of angora and merino are used for felting a picture.
Types of wool
For felting, only natural fleece is used, without synthetics.
Cardboard, or wool wool, falls very quickly and does not require additional chopping, because the fibers are short and mixed together. Combed tape, or tops, is combed with high quality, so the long fibers lie in one direction, without impurities.
Sliver is an unprocessed wool fiber used for the base of the product. Angora or merino is used for decoration and small details in the product.
Felting needles
There are 4 types of needles used in felting. Each has nicks, thanks to the nicks the wool becomes felted.
Needles are sold as a set, under a specific marking:
- No. 36 triangular (main), dumps the drain;
- No. 38 has a star shape, creating a relief on the product;
- No. 40 triangular, for working with thin and small parts;
- No. 38 crown (has 4 sides), for decorating the product.
When working with needles, follow safety rules and do not work with weights. Use a support (foam sponge, hard bristle brush). The brush (sponge) will protect your fingers and work surface from punctures.
Try the dry felting technique for beginners
To start using multi-colored unspun fleece, remember 11 dry felting lessons for beginners:
- the idea that has arisen must be sketched, the drawing will be your guide;
- work only on the substrate;
- take 3 times more wool; when felting, the volume will decrease;
- divide the material into small fibers and mix together;
- threading begins with the thickest needle, gradually changing it to a smaller diameter;
- punctures in the part must be made from all sides, only vertically, deeply and quickly;
- the finished parts look smooth in appearance, without protruding fibers, and do not deform when pressed;
- While the surface of the elements is still loose, you can change the shape and dimensions of the product;
- to join the finished craft, you should leave strands of unfelted wool in small parts, thanks to them the connection occurs;
- when sanding crafts, the sharpest needle is used;
- It is advisable to do paired parts (wings, legs) at the same time.

For training, you can take a padding polyester, tear it with your hands and a 38-gauge needle, and, for example, make a ball on a backing. Perpendicular to the working surface, pierce the padding pad as deeply as possible.
Slowly but surely the padding polyester will turn into a tight ball. When it is no longer possible to puncture, the product is ready. You can also check by sound whether the ball has fallen off or not. There should be a dull sound, like hitting wood.
Based on the felting technique, anyone can learn how to felt small and large items.
This is painstaking, but very exciting creativity!
All products created by you will be unique and will surely delight your family and friends!
Dry felting a small wool toy for beginners
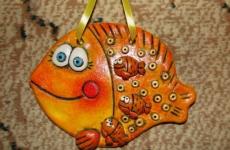
Chick
You will need a universal needle number 38, which does not require replacement. Angora red and yellow, felt, transparent glue, black beads or large beads and all the tools necessary for felting. This craft is done within 4 hours.
Distribute the material into small fibers, the smaller the better. Having formed an oval, felt the body with vertical punctures. Make the head and wings in the same way. Attach the head and wings to the body using small pieces of wool. Make indentations for the eyes on the head and glue beads.
Felt the red beak and roll it to the head. Make chicken legs from wire. Cover the frames of the legs with red angora and stick them into the body. Use red felt for the chicken's scallop, glue it or attach it with a needle. Sand the finished craft with a fine needle. The craft is ready!
If you involve your child in the activity, felting toys will become your common favorite pastime!
Felting lessons
Drawing or layering of wool is done with minimal use of needles, merino or angora is placed on top of each other and joined together with light pressure from the palms.

Be sure to apply glass to the picture, all the nuances will be visible under it. Also, through the glass the entire color scheme of the design will be visible more clearly. It is most convenient to work with thin and superfine wool.
The richer the palette, the more picturesque the picture. If there is a shortage of shades, you can mix different coat colors to achieve the desired result.
If viscose is used in the painting, it is better to mix it with wool 1:2 to avoid excess shine.
During the work process, it is best to iron the painting to fix the wool and align the details. If you want to cut wool fibers into large and dense pieces, keep the scissors close to the picture, and if it is crumbly, then vice versa.
To make it easier to pinch angora or merino with small transparent “webs”, the combed tape needs to be felted a little.
Use only the sharpest scissors with sharp ends. The best ones are hairdressers. In addition to scissors, you will need tweezers. It is needed for decorating paintings (removing lint, crumbs or laying out small details).
Here is an example of dry felting a painting for beginners.
The painting will require non-woven fabric (base) or linen fabric. Carding, needles and scissors. Cardboard, frame and glass. Angora is blue, blue, white, green, dark green and light green.
In the future we will get a landscape:
- Lay a thin layer of carded paper over a piece of linen and felt it (drive it into the fabric with needles). You will get a white background.
- Visually divide the surface of the canvas into two parts. Lay out the top of the picture in blue, just below blue and white. Pay close attention to the wool “strokes” so that there is no large color contrast or gaps. The layers should be as thin as possible.
- From the horizon, lay out dark green, then green and light green. The result will be a meadow with emerald grass, turning into an azure sky. Place the picture on cardboard, straighten the edges with scissors, cover with glass and insert into a frame. The landscape is ready!