We decorate the hair clip with a kanzashi butterfly made of satin ribbons. Delicate rubber bands with DIY kanzashi butterflies made from satin ribbons DIY kanzashi butterfly
In summer, butterflies flutter around us - bright and frivolous. And kanzashi butterflies can also appear on the hair of little girls if their mothers are needlewomen. You can't buy such beauty in a store. Unique products can only be made with your own hands. For creative moms who are looking for new ideas, want to do something new, this lesson is given. As a result of repeating all operations, you will receive a beautiful hairpin decorated with a butterfly. This option will be relevant for summer.
For the butterfly hairpin we need:
- 2 pieces of blue, blue, violet, red, orange, yellow ribbon - 5*5 cm;
- 2 pieces of brown ribbon - 4*4 cm;
- 6 pieces of green and light green ribbon - 5*5 cm;
- Base clip (crocodile) - 6.5 cm;
- Green felt circle - 4 cm in diameter;
- Crystal half-bead-oval - 1.3*18 cm;
- Double-sided stamen for antennae;
- Thread and needle for assembling the structure.
We suggest you make a hair clip decorated with a bright butterfly. You see that the list of accessories indicates a lot of different shades, all of which will be used to create the wings. The wings themselves will represent different types of kanzashi petals: triple sharp, triple round, sharp with a fold in the middle, oblong round with a fold. All petal options are clearly shown. You will also need scissors, a lighter and glue to work.
Kanzashi butterfly step by step
1. Prepare square pieces of ribbon. You will need to combine details in blue-violet, yellow-orange, and light green colors. Burn all the cuts at once.

2. Using light blue, dark blue and purple ribbon, make two triple pointed wings. As always, form four-layer squares by folding each square individually.

3. Make a layered piece: the outer layer is blue, the middle layer is blue, and the inner layer is purple. Round the multi-layer workpiece and cut off the bottom.

4. Two identical blue-violet parts will become symmetrical butterfly wings.

5. Prepare a second batch of squares - yellow, orange and red - for the second pair of wings. Again, the cuts need to be singed. Fold the squares in half.

6. Layer one triangle on top of another: Yellow on orange and red. Close all three corners at one point.

7. Squeeze the closed part of the workpiece on the sides. Form a curve in the middle to squeeze out a droplet shape. The inside of the wing will be yellow, the outside will be red, and the inner layer will be orange.

8. Turn a 4 cm brown ribbon into an insect body, preparing another type of simple petals. Fold the squares in half.

9. Bend the triangles in height, bending them back, protruding the middle. Then return the side corners to their original position, pressing at the bottom with a fan. This way you will get oblong petals with folds.

10. Make two brown petals for the butterfly body.

11. And the last type of petals is the color of lush green. They will combine sharp details and droplets with a fold. Bend the dark green squares diagonally. Also bend the light green ones according to the same principle, but also pull the corners back.

12. Turn the dark green fragments into four-layer triangles, and the light ones into droplets using the method described for the brown parts. Collect a rounded petal by inserting a thin droplet inside the dark layer.

13. Make 6 green petals, leave only two as they are, and cut the remaining 4 larger. They should be smaller (they will need to be glued at the very end).

14. Gather the skeleton of the butterfly onto a thread. Place the brown fragments of the body vertically, adjoin them with two upper blue-violet, two lower yellow-orange and two central green wings.

Master class Kanzashi butterfly, dragonfly and ladybug
The kanzashi technique is often used to create original hair decorations. Basically, all kinds of flowers are made from satin ribbons. Today we will talk about making wonderful butterflies, ladybugs and dragonflies with our own hands. There are many techniques on the basis of which such accessories can be made. In kanzashi, the principle of making products from pieces of ribbon is taken as a basis. Following the step-by-step MK, as well as photo and video examples, you can easily repeat similar products after experienced needlewomen. 


Kanzashi butterfly
Before starting the master class (MK) on creating a butterfly kanzashi, prepare the following materials and tools for work:

The kanzashi butterfly will be created from small pieces of ribbon. At first. We take a small piece and chop it together with the second one. These parts need to be bent into an airplane shape, as in the photo, and secured at the bottom with a needle. We do this to avoid seam divergence. Next, at the cut site you need to glue a rhinestone to hold the borders. If you don’t have rhinestones, you can skip this step when adding the elements, just hold the seams with your fingers. We singe the lower part and squeeze the seam with our hands. As a result, we get the next element, as in the photo. Now, you need to fold it evenly, press it with tweezers and cut it. In order to determine the amount of tape to be cut, fold it as follows, as shown in the photo or video: 


The lower part is trimmed and singed. If you didn't use rhinestone, just use your hands to press the seam down along the bottom to keep it in place. Next, the first of the wings must be attached in such a way as to determine the amount of material to be cut from the second. 
We continue the master class and form a petal with a fold. There should be 3 similar folds in total for subsequent insertion of the petal. 
Please note that you need to glue a small petal into the center of the petal with a fold. Glue is applied along the bottom of the part, after which the fold widens and the petal is carefully placed inside. The next step is to glue the petal with a fold into the large element. In this case, the glue is applied to the seam, so that it is on the underside of the seam and a little on the side parts. Do this carefully so that you do not end up with excess glue. In the place where the petals begin, it is necessary to fix the rhinestone. 
At the bottom, we make round petals. If you are not familiar with the technique of creating them, the MK video will tell you how to do it. You can make them triple and fix the rhinestone on the finished element. At the next stage, the master class moves on to creating a ponytail. 
You need to take a needle and thread and stitch the workpieces at equal intervals. Please note that the butterfly wings located in the upper part must be pierced and all three parts captured. The needle is pulled out in the center of the tail, a bead is put on and goes in the opposite direction. Next, the process needs to be pulled together and three knots made. At the bottom of the butterfly's wing gathering area, apply a bead of glue to capture all the wings and smooth them out. 

Now, our butterfly must acquire a body. We take a pin and string one small bead on it, a rondelle, another large bead, a cap, five beads. We perform the same actions with the next pin. Next, you need to insert the first and second pins into the rondel, string a large bead, rondel, and beads along the entire remaining length of the pin. The ends must be rounded using round nose pliers for this purpose. As a result, you should have a butterfly body, as in the photo. 

In the center of the wings, carefully glue the created body.
The thread comes out from the bottom of the rondel that is located at the top. We make a circle around it and draw a thread on the bottom of the other side. Thus, you need to hide the thread among the rondel and the bead. Similarly, we draw the thread on the second rondel.
The remaining ends of the threads are tied with three knots.
We take lace, in the center of which there should be no holes. The folds are straightened, and the kanzashi butterfly is glued to this material. After which, each of the wings is fixed on the lace. An elastic band or other special fastening is sewn at the bottom, depending on what your butterfly will serve as a hairpin, a decorative element on a headband or hoop, etc. 


This completes the master class. This delightful butterfly can also be made from satin ribbons in contrasting shades. Experiment, make your butterflies in an original and unique style. The video tutorials at the end of the article will show you more options on how to make butterflies from satin ribbons. 
Video: Making a kanzashi butterfly
Dragonfly
Another option for a hairpin is the kanzashi dragonfly.
We will need:
- ribbons of a suitable shade;
- lighter or candle;
- base for hairpin;
- beads;
- glue.
The master class begins, as usual, with cutting satin ribbons into squares. You need to make round petals from white ribbons. Next, the square blank is bent obliquely. The next step is to wrap the sharp corners of the resulting triangular figure in the middle of the right corner. We take the resulting element and connect it along the central line. We delete what is unnecessary. The cut areas must be scorched with a candle or lighter. As a result, you should get a round petal, from which the wings of the kanzashi dragonfly will be formed. In total, you need to make four petals for the wings. 


Next, the dragonfly must acquire a body. To create the body, we create a sharp-shaped petal. The square segment is folded in half several times. The corner is cut and singed with a lighter. This way we get a part for the dragonfly body. In total, we create three blanks. The round petals are connected to each other using glue. In the photo you can see this process. Then, using glue, attach the dragonfly wings to the base of the clip. Sharp-shaped elements are placed on top, thus creating the body of the dragonfly and covering the area where the rounded petals meet. All that remains is to decorate the dragonfly with beads with your own hands. 


This is the kind of wonderful dragonfly you should get. 
Video: Hairpin in the shape of a dragonfly
Ladybug
The final master class (MK) is devoted to creating a ladybug from ribbons. 
This ladybug is quick and easy to make. One of the longest processes is fixing rhinestones on ribbons. So, to make it, prepare:
- satin ribbon (from four to six centimeters wide);
- small black rhinestones;
- narrow satin ribbon (six millimeters);
- beads;
- Super glue;
- glue gun;
- thick thread.
The ribbon ladybug begins by creating a petal with a sharp kanzashi shape, which then needs to be singed and turned out. It turns out one wing. In total we make two such inverted elements. Next, prepare a narrow ribbon, roll one part, singe it and make a head for the ladybug with your own hands. The tail is made from the second segment. Using hot glue, we fix the wing petals to each other. After that we glue the head and antennae. We make the antennae from two pieces of thread, the length of which is equal to one centimeter. All that remains is to attach the tail and stick the rhinestones on the wings. 


This ladybug will look great as a hairpin or brooch. Just choose a special mount for it.
A few more video lessons will show you how to create similar crafts using the kanzashi technique in an interesting style.
Video: DIY Kanzashi ladybug
There are many ways and master classes for creating various decorations from ribbons. Most often, such lessons contain information about making lush flowers, but many are also interested in other options, for example, a butterfly made from ribbons. You can do it with your own hands quickly and without any problems. You just need to familiarize yourself with the basic elements, as well as the techniques for performing them. Beginners will be helped by step-by-step instructions that explain all stages of the work.
Popular decoration: DIY butterflies
This element can become the decor of a headband, elastic band, bracelet and even a ring. Cute creations made from bright ribbons will lift your spirits and remind you of sunny days all year round.
A DIY ribbon butterfly is made in different variations. But when making it, the same principle is always used - this is folding petals from round or rectangular pieces of ribbon.
Simple kanzashi butterfly
When thinking about making your own tape, first you should pay more attention to the step-by-step instructions. The best choice would be a simple butterfly for beginners, and after that you can move on to more complex decorations.
To work, you should prepare tweezers, scissors, light threads, a needle, a lighter, transparent glue and ribbons of two colors (3 and 6 cm wide). Additionally, rhinestones, beads, beads and rondels will be useful.
Making the upper wings of a butterfly
A DIY ribbon butterfly can be made quickly and without any problems, but to do this you need to strictly follow the instructions. To make the upper wings, cut a piece 10 cm long from a wide ribbon. The piece is folded in half lengthwise, and then its edges are shaped like an airplane. To make it convenient to work with the part, the junction of the edges must be grabbed with a needle. For a more durable fastening of the structure and for decoration, you need to glue a rhinestone at the joint near the spout.
The corners of the part need to be folded and secured with tweezers. The excess edge is cut off with scissors, and the bottom edge is also leveled with their help. To make the upper wings the same, it is better to make two parts in parallel, placing them next to each other and comparing the sizes. The edges are singed separately at the bottom, and together at the sides to create boat-shaped parts.
Now you need to make round inserts from a ribbon of a different color. The petal should have three folds. After this, you should make a small sharp petal, which is placed between the folds of the round one, having previously lubricated the lower part with transparent glue.

Making the lower wings of the Kanzashi butterfly
To create the lower parts, you need to take a piece of wide tape 6 by 6 cm. Fold it in half and form a round single petal. A smaller petal is created from a narrower ribbon and glued inside a large part. The second wing should be made in the same way.
Combining parts into one design
All elements of kanzashi decoration are sewn together with a needle. The upper wings must be pierced in such a way as to capture all the folds. All parts are pulled together with thread and secured with several knots. To secure them firmly, you need to apply a little transparent glue to the base of the wings.
A butterfly made from ribbons, made by hand (kanzashi), looks beautiful, but in order for the structure to be durable, you need to take care of its strong connection. The wings are attached to the body. To make it, you will need a pin on which a small bead is strung, a rondel is put on top, and then six beads of the same size. Next, you need to take the second pin and string the same parts onto it in a similar sequence. After this, both pins are inserted into one rondel, a large bead is put on, and a second rondel is placed on top. The tips of the pins are covered with beads.
Now all that remains is to connect the wings to the body. For these purposes, transparent glue and a needle with a light thread are also used.
Making hairpins: DIY ribbon butterflies
Similar elements in the kanzashi style can be a wonderful decoration for hair. A butterfly made of satin ribbons should be glued to a hoop or hairpin. Transparent glue is also best suited for these purposes.

Kanzashi dragonfly
A ribbon dragonfly will be one of the easiest crafts that you can make yourself. To work, you need to prepare a satin ribbon about 2-3 cm wide, a narrow shiny ribbon, beads of different sizes, scissors, wire, thread, a needle, tweezers and glue.

The first step is to make the wings. To do this, the satin ribbon needs to be cut into pieces about 6 cm long. One edge of each piece should be cut in the shape of an angle. After this, the edges of the resulting corners are glued from the wrong side. When the glue dries, the parts are turned out in such a way as to form a kind of petals. Next, use glue to connect the lower corners on the front side.
In this way, four petals are made and combined into wings using glue. Next, you need to make a body for the future dragonfly, for this you will need two pieces of wire 10 cm each. They are twisted together, a knot is left on one end, and two free ends on the other.

Beads (no more than 14 pieces) are strung on the wire; the trailing one should be larger. The ends of the wire are secured so that the body does not fall apart.
As a result, the dragonfly needs to be collected. The body of beads is fixed to the finished wings using glue. Moreover, if desired, you can decorate the wings; shiny ribbon, beads, rhinestones, beads, etc. are suitable for this.
Men's butterflies made of satin ribbons
A bow tie has long become an integral attribute of a stylish male look. This accessory can increasingly be seen on girls, as well as younger boys. To look beautiful and elegant, you don’t have to go to the store. We suggest making a butterfly from satin ribbons with your own hands.
To make such a tie yourself, you need to prepare two ribbons about a meter long (1 and 4 cm wide), threads, matches, scissors, a needle, special hooks and glue.

Bow ties made from ribbons by hand: step-by-step instructions
Butterflies most often consist of two bows. To make the first of them you will need a piece of wide tape about 25 cm long, for the second - 35-40 cm.
A smaller ribbon should be folded in half so that the ends slightly overlap each other, and the junction of the ends itself is located in the middle of the part. Along this middle of the butterfly you need to make forward stitches with the needle, tighten the thread and wrap it around the ribbon to make a bow. In the same way you need to make a second bow of a larger size.
Now you should start making the base of the butterfly. To do this, you will need a thin ribbon; the finished bow will be sewn to it, and it will hide under the collar. You need to cut two parts: one according to the volume of the neck with a margin, and the other - a small size for attaching a bow.
A thin long ribbon must be treated with a match flame so that the threads do not fray. Two bows are glued or stitched so that the small one is located on top of the large one. At the back of the large bow you need to attach a long ribbon and cover it with a small ribbon. The ends of the latter need to be sewn in such a way as not to fix the long ribbon; it should move in different directions.
At the end of the work, all that remains is to sew on fasteners in the form of Velcro, buttons, etc. You can buy special hooks that are used when sewing bras.

Now that all stages of the work are described in detail, a DIY ribbon butterfly can be made quickly and easily. This element will be an excellent decoration for hair clips, jewelry and even paintings.
It's spring outside. The trees turned green, the flowers bloomed, the butterflies began to swirl... Why don’t we try to create the same beauty?:)
Materials and tools for creating kanzashi butterflies
- satin ribbon (different colors and different widths)
- fishing line
- beads, beads, sequins
- glue "Moment or gun glue"
- candle or soldering iron
- scissors
- ruler
- pencil
- thread or monofilament
- tweezers
Master class No. 1: Kanzashi butterfly made from ribbon of the same color

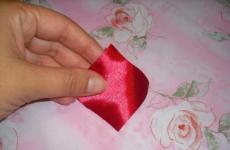
To create such a butterfly, we will need two squares of satin ribbon (here 5x5 cm), beads, sequins, a small piece of fishing line:

Lubricate a piece of tape with glue and, folding it in half, glue it together. Make sure the edges match:

Fold the resulting triangle in half and bend the tip, as shown in the photo:

Glue the curved end. We also fold the second piece of tape.

Front and back view
It turns out that the bent edge is, as it were, raised in the middle. We cut out small indentations at the fold.

And burn the edge, making it slightly wavy.

We do the same for the second wing.

We attach a small bead or seed bead to the fishing line using glue. We string larger beads and fix them with glue.

Antennae for a butterfly can be made according to the master class
We cover a piece of cardboard with fabric and glue beads on a fishing line on top. This will be the body of our butterfly.

Glue the wings of a butterfly to the body, with the curved edge up.

We decorate the wings of the Kanzashi butterfly with beads or sequins.
Master class No. 2: Kanzashi butterfly made from ribbons of two colors

For such a butterfly we will need a red satin ribbon (5x5 cm - 4 pcs), a yellow ribbon (5x5 cm - 4 pcs), fishing line, beads. The tools are the same.

We fold two wings using the master class. Fold the ribbon twice and place the triangles on top of each other.


We assemble the body of the butterfly in the same way as described above (in master class No. 1).

Glue narrow petals with round ones:

We glue the wings together, and glue the body of beads on top.

This is the butterfly we got.
Master class No. 3: Kanzashi butterfly made from ribbons of three colors

To make such a butterfly we will need ribbons of three colors, beads and fishing line:

We cut the ribbon burgundy (5x5 cm - 4 pcs), yellow (5x5 cm - 4 pcs), red (4x4 cm - 4 pcs), yellow 2.5x2.5 cm - 2 pcs).

We make two wings from burgundy ribbon using the master class

We fold the yellow and red triangles, place them on top of each other and fasten them with a needle.

We wrap the side corners of the red ribbon to the bottom edge.


Glue the resulting round petals into narrow burgundy petals.

Place the burgundy, yellow and red triangles on top of each other and fasten them with a needle.

And in the same way, wrapping them towards the middle, we make two round petals.

In this master class, kanzashi butterflies made from satin ribbons fly towards you, which you can use to decorate elastic bands or hairpins for girls.
Detailed step-by-step photos are designed for the most inexperienced and novice needlewomen. To make a beautiful decoration using fashionable Japanese technology with your own hands, all you need is desire and patience. Girlish ponytails or braids with butterflies will look beautiful and spring-like even in winter. And you can make as many harbingers of spring as you like and to match any outfit.
Craft materials
If you are going to work with satin ribbons for the first time, take a look at our website. There you will learn about some of the nuances of needlework and material processing. Perhaps it’s better to try first, it’s much easier to work with.
To make beautiful butterflies with your own hands using the kanzashi technique you will need:
- two types of satin ribbon: wide and medium;
- tweezers for needlework;
- scissors;
- lighter;
- glue gun;
- half beads;
- felt;
- elastic bases.

The tape must first be prepared by cutting it into squares and singeing the sections so that the material does not crumble. You can cut and turn at the same time using a special tool.
Step-by-step manufacturing technique
Delicate butterflies for rubber bands consist of two types of petals: triangular and pleated. To make a triangular one, you need to fold the square diagonally.


And so on two more times until you get a figure like in the photo.


Trim the front to size. Hold the cut slightly over the lighter. When the material melts, glue the tape together using tweezers.

Trim off the excess from the bottom and lightly melt it with a lighter so that the cut does not crumble.

The first kanzashi petal for the butterfly is ready.

For a petal in a fold, the first two steps must be repeated.


Then fix the fold with tweezers, step back a millimeter and bend the sides.

Bend it back so that on both sides you get a fold parallel to the fixed fold. Using tweezers, squeeze all three folds.

Bring the remaining sides forward, forming the outline of the petal.


Cut the front and glue it with a lighter.

Cut off the excess from the bottom and singe the cut.

The folded petal for the wing is ready.

Make triangular petals from small squares, as described in the first part.


Total for one butterfly kanzashi you will need: 2 folded petals, 2 large triangular ones and 8 small ones.

The small petals will make the middle for the large one. To do this, glue two petals from below and glue another one between them.

Cover the reverse side with hot glue and insert it into the large element.

Glue two different large petals.


Using small parts, connect the two halves together.

Decorate the middle with half beads.

This is what a spring beauty looks like. Now you need to glue it to the elastic band. To do this, you will need two small pieces of felt that match the color of the elastic band.

Glue one piece to the elastic band, and stick a butterfly on top.


Use the second piece to secure the elastic band between the felt.

Butterflies on elastic bands are ready for their duties.

Surely these will appeal not only to your daughter or granddaughter, but also to her friends. Not a bad gift for neighbor girls and relatives' children. The materials are cheap, but the products look luxurious! Look, you will have something to do in the coming months!
A master class on making a butterfly using the kanzashi technique to decorate a hairstyle was prepared by Yulia Zapara. We wish you nothing worse!