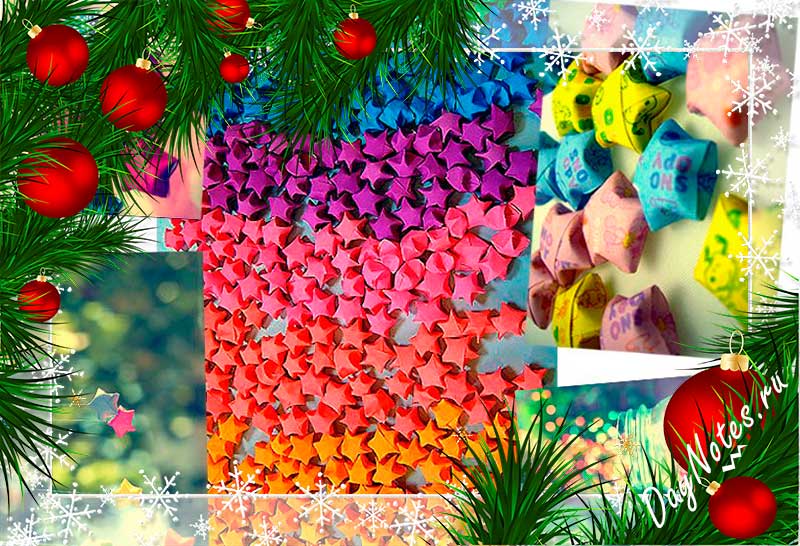
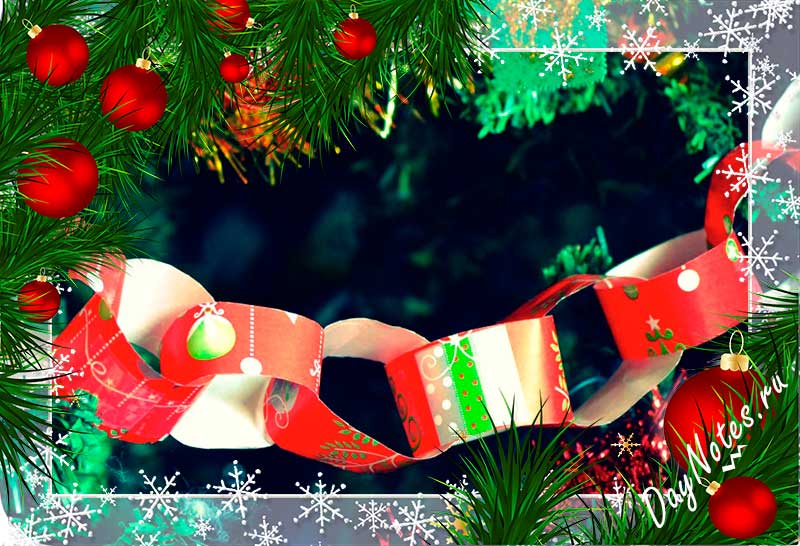
We make beautiful and festive garlands ourselves. DIY garland for the New Year made of paper with templates and diagrams DIY garland of voluminous stars
Why not make the starry sky your wedding theme? Let stars be everywhere. In the decorations of the hall, in the attire of the bride and groom, on the sweet table and in the hands of the bridesmaids.
Preparing details and decorations for such a wedding will not be difficult; you can make them yourself. And such a wedding will look truly fabulous.
In this master class we will tell you how to make garlands of stars. They will serve as a decoration for the banquet hall and the bride’s room; you can also take them with you to a photo shoot and hang them on the trees in the park. You will get original photos.
To make garlands of stars we will need:
Colored cardboard (you can use silver or gold)
Long satin ribbons, 0.5 cm wide
Glue
Note: The master class uses a hot-melt gun and hot glue. Its distinctive feature is instant hardening (10-20 seconds) and a strong connection. But it’s not so easy to master a glue gun the first time, and besides, it’s not cheap. Therefore, the heat gun can be replaced with ordinary glue.
Scissors
Pencil
The process of making garlands of stars:

For a “star” wedding you can also make
Good afternoon. Today I want to tell you how to decorate your house for the New Year using a garland. We will do DIY New Year's garland. And I'll show you 33 ways its creation. We will crochet a garland, cut it out of paper, sculpt it out of cotton wool, and make modules for the garland out of salt dough. You'll love this collection of ideas. Moreover, there are many options within the strength of children's hands, which means the whole family can take part in creating New Year's decor for your home.
So, let's start creating beautiful home decorations with our own hands. Onward to the New Year!
Children's garlands for the New Year
FROM PAPER.
At the very beginning, I will show you what garlands children can make for the New Year with their own hands - in classes in kindergarten, or at home with their mother.
A garland with houses is suitable for the little ones. We cut out silhouettes of houses (pentagon) from colored cardboard. From white plain paper we cut out the bottom snowdrift and the coal shape of the snow on the roof. We also cut into 2 bowls – doors separately and windows separately. The child’s task is to glue snowdrifts (down and onto the roof) and doors with windows onto the cardboard silhouettes of houses. Then the teacher himself or the mother strings the houses on strings, interspersing them with white circles of paper. To prevent the houses from sliding along the thread, you need to use a thick woolen thread and secure it with tape on the back wall of the house. This garland will look good on the window.
Children will also enjoy making their own New Year's garland of three stars(on the right photo below). Here it is important to teach the child to apply the stars in such a way that the rays lie spread apart - they do not coincide with the lower silhouette of the star.


Garland for children
from sandmen.
We cut out silhouettes of people from rough brown cardboard and the child colors them (it’s convenient to use cotton swabs when drawing dots of buttons, cheeks and eyes. White wavy stripes are more difficult to make, but you can help the child.

Children can also make blanks for a garland with paper holly leaves. Berries are possible roll from red felt(in hot soapy water, roll pieces of felt into balls, like plasticine, and let dry overnight). This method is called felting.
Can make red berries from cotton wool(mix pva glue with red gouache (more glue, meunier gouache) - soak pieces of cotton wool in this red liquid, roll balls from it, dry overnight.
Or you can roll berries for a garland - from crepe paper(just roll out lumps from crumpled corrugated paper).


Red and white garland. If children (even the smallest ones) are given large white cardboard templates of Christmas tree decorations, a brush and one paint (red only). Then you will get a good result. Before this work, you need to teach your child to draw different types of lines:
- (straight(vertical and horizontal)
- criss-cross,
- rounded "like smiles"
- large round dots(you place the brush vertically and twist it with your fingers like a spindle - you get a completely even circle).

This white and red garland can be made not on the basis of cardboard, but based on SALT DOUGH(as it is in the photo above).
A glass of salt + a glass of flour + 1 tablespoon of vegetable oil(so it doesn’t stick to your hands) + water(add gradually, stop adding when the dough becomes like tight plasticine.
Roll out on the table (we roll out without flour, thanks to a spoon of butter, it will not stick to the table). Cut out the shapes of Christmas tree decorations. If desired, you can apply SCREEN STAMPS to the surface of the rolled dough (even before cutting out the silhouettes). Any embossed lace, or a knitted napkin, or a piece of wallpaper with a raised convex pattern can act as a stamp. We place this “stamp” on the dough and roll it with a rolling pin, pressing it so that the relief is imprinted on the surface of the dough. We dry the figures in the oven - paint them in white gouache and dry them. And then we give the child paints to apply lines, stripes and polka dots.
GARLAND New Year's
FROM CONES.
Children will also enjoy making a garland from natural materials. If you have small pine cones, they are perfect for a New Year's garland. They are quite light. If the cones are dried on a radiator or in the oven, they will open their scales and can be easily painted with gouache in bright colors. After the paint has dried, it is better to spray it with hairspray - this will make the color brighter and stop getting your hands dirty (the color is fixed). We make eyes, a beak from plasticine and sew hats from red felt (or red paper). We attach the cap to the pine cone with glue.

Based on the pine cone, you can make other New Year characters, gnomes or Santa Claus. If he paints the pine cone white, we will get the basis for the snowman.

New Year's garlands
IDEA WITH A DEER.
The simplest garlands with deer are a flat silhouette made of cardboard, which is decorated with an applique of colored paper. In one evening you can cut out 20-30 such silhouettes. Then glue on the faces, spots, and decorate the hooves with a black marker. Separately, cut out the horns from black cardboard and attach them to a stapler.

And here is an interesting design of a module for a garland in the form of a THREE-LAYER deer. Everything in the photo is quite clear here. We cut out three silhouettes and string them with string BETWEEN THEM, inserting thick layers - either from beads, or from a cut-up cocktail tube, or simply from lumps of paper.

New Year's idea
For a garland with Santa Claus.
Here are ideas for garlands of pendants with the image of Santa Claus, the easiest way is to cut out triangles from red cardboard, glue a strip of a face and a beard made of cotton wool to them from beige paper.

Here are ideas for a quick garland made from cotton pads. Here, using glue-pva (or hot glue), we attach a face made of pink paper, a mustache (from pieces of a disk), a red nose and a hat made of cardboard.

The garland looks good not with small modules, but with large elements. For example, in the photo below, the New Year's row of Santa Clauses looks impressive and bright due to its size.

New Year's garlands
FROM PAPER STRIPES.
And here is an example of a beautiful garland with lanterns. For a flashlight you need five strips - 2 long red, 2 slightly shorter green, 1 shortest red. We connect the strips with edges using a STAPLER - from the upper end and from the lower end. Then, just below the top staple fastening, we make a hole with a hole punch - to string it on a rope.

Using the same scheme, these lanterns for the garland are made. A strip of paper is folded into several folds (diamond-shaped). The edges are connected at the top with a stapler. Around this upper end we make a wrapping from a gray strip of paper (this turns out to be the base of a light bulb).

And since we touched on the topic of flashlights, here’s more for you idea of three-dimensional modules-bulbs for a garland. A little later I will make and post a diagram and template for such a light bulb.

You can also twist paper strips into twisted strands. And then we will get twisted modules for quilling crafts. We make green New Year wreaths or Christmas trees from the modules and string these crafts onto a garland.

New Year's garlands
WITH BLADE modules.
In the photo below we see an example of how beautiful the blade modules look on a garland. I showed how to make such lobed three-dimensional figures in the master class below.

Using the paddle technique, you can make not only circles, but also any other SYMMETRICAL SHAPE shapes. That is, the main thing is that this figure has the same sides - right and left. Like a star (with photo below) and like a snowman, for example.

New Year's garlands
DIY FOLDING BOODS.
Here is a garland with minimal paper consumption. We cut out the triangles - we bend the triangle in half vertically (along the center line). And we make cuts - from the edge and from the side of the fold line too (as shown in the diagram below - in a checkerboard pattern). After this, our triangle can be stretched - like a spring, and you will get a Christmas tree.

You can use short strips of paper to make small fans (staple them at one end) or bend them in half and glue the halves together (as shown in the photo). And then we assemble a colored garland from the fans using the same stapler (or glue). It can be hung above the door, along the wall, along the mantelpiece, along the curtain rod, along the stair railing.

Such a garland can be made from fans of different heights. And then the tall fans will look like FIR-trees. It can be made green (like a Christmas tree), and the intermediate middle fans can be made white (like snow).

You can cut the fan so that it has a leg in the center as in the photo of the garland below.


Based on a round fan, you can make many different modules for a garland pendant for the New Year. With Santa Claus, with deer, with a snowman, with a penguin.

Garlands-STARS
for the New Year with your own hands.
And here are ideas where the garlands are made in the shape of the symbol of the New Year - a star. There is an article on our website where we make stars out of paper - there you will find many different ways. And here I post those that are not there.
I really like this option - it is very economical in terms of paper consumption. From just one strip of paper you can make a VOLUME large star. This is cool.
And follow the garland rule - alternate colors. In the photo below, if all the stars were the same color, the garland would be lost. And then there is an alternation of two contrasting colors and the garland hits the eye brightly

But the star is made of thick paper or cardboard. Here, please note, you need TWO-COLOR cardboard (so that all edges are colored).
Or, to save money, you can simply make such stars out of white paper (thick for drawing) and then use dry wax crayons to draw your own patterns of curls or stripes on this white paper.

But the easiest way to quickly make a star out of paper is with ready-made folds for embossed edges (so that the star immediately has a convex volume).
We fold a regular sheet of paper in the manner shown in the diagram below.

Here again we see what it looks like in the photographs.

New Year's garlands
From toilet paper rolls.
You can string these New Year's gnomes onto a garland. We paint the toilet paper tubes in different colors with gouache (or cover them with colored paper). We fold the woolen threads into several folds in a bundle - we cut off the ends of the bundle, bend it in half and glue it to the sleeve with hot glue from a gun. On top we make a hat out of paper - it can be white, or it can be colored (red like Santa Claus with a white border around the edge). The border can be made from white lace braid (button shops cost mere pennies).

If a paper roll is cut into rings, then many more modules for an indoor New Year's garland can be made from this material. For example, these snowflakes are obtained if the rings are inserted into each other - connecting them in the center with threads (the stitch is as if we are sewing a button, and cover it with glitter). The rings themselves need to be painted in the color of the snowflake (white or blue).

You can make bright flowers if you cover the back side of the ring with colored crepe corrugated paper.

Such flowers made from ruts from a bushing can be decorated inside with a fluffy wire brush. Or quilling modules made from paper twists.


Children's garland for the New Year
WITH BELLS.
An excellent material for a DIY New Year's garland is CAPSULES from a coffee machine. Used coffee capsules look like little bells. We make a hole in the bottom of them, thread a silver or gold ribbon through it, thread a bead and tie a knot (the bead can be twisted into a piece of foil). We string bells onto a long and narrow Christmas tree brush garland (from the store) - you can do it in pairs, or you can do it one at a time and we get a long and shiny garland with bells for the New Year.

You can make bells for a New Year's garland from an egg carton, easy colored paper (pictured below). You can make bells using the blade gluing technique.

Knitted New Year's garlands
With my own hands.
On our website there is an article about how to crochet Christmas trees. And there I give instructions for creating flat Christmas trees. Like those in the photo below.

If such trees are strung on a long string, then we will get a garland to decorate the walls or mantelpiece on New Year's days. Below we see the works of Natalia Pushkina - combinations of two shades of green and red beads gave the Christmas tree a warm festive coloring.

You can create flat Christmas trees for the garland using a DIFFERENT crochet pattern. For example, like the ones in the photo below. 
You can take absolutely any New Year's symbol as elements of the garland. For example, a Christmas wreath or bright light bulbs.
The wreath is knitted around a ring (plastic rings are sold in the same section of the store as buttons - these are clothing accessories). We tie such a ring with single crochets and knit lace on it. We thread a red ribbon through the lace and get a quick garland element.

You can knit small snowflakes and string them onto a garland. I posted many patterns of crocheted snowflakes in a special article “Crocheted snowflakes”

Or you can tie New Year's stars onto a garland, as in the photo below.

Below is a master class where you can see exactly how such a star is knitted.

Your knitted modules for a garland can depict any symbol of the New Year - Christmas tree decorations, holly leaves.

Below I am posting a master class on knitting a holly leaf.

From the leaves left after the garland you can make a Christmas knitted wreath like this.

These are the tips for creating a New Year's garland with your own hands that I presented here. This new year, you have the opportunity to decorate your home in an unusually bright and interesting way - together with your children.
I wish you a fun evening and a beautiful result.
Olga Klishevskaya, especially for the site ""
If you like our site, you can support the enthusiasm of those who work for you.
Happy New Year to the author of this article, Olga Klishevskaya.
Good afternoon, today I am publishing an article in which I have collected a variety of ways to make New Year’s stars with your own hands. We will make stars paper, cardboard, sew stars from felt, crochet them. You will see simple christmas crafts, accessible to children, as well as complex designs in the shape of a star.
Here are the ideas I collected today in one general pile:
- Stars made from strips of paper using the quilling technique.
- Transparent stars with stained glass film.
- Three-dimensional stars in 3D technology.
- New Year stars window stickers.
- New Year's garlands with stars.
- Six-pointed stars with convex edges.
- Stars made from cardboard modules.
- New Year's stars from the newspaper.
So let's start our New Year's star crafts.
Craft idea #1
Paper star
using the QUILING technique.
Here's the first idea - a New Year's star made from strips of paper, twisted and glued using quilling technique.

Even if you are not yet familiar with the technique of twisting paper strips, then you just need look carefully See the photo below to understand how this paper star is made.
First, we assemble individually from paper strips five rays– and then glue them together.
In the photo below, I even highlighted each detail of the paper strips separately - in different colors.

Each ray of a star consists of three short oval twists of paper strips - light green lines. One twist is longer – orange line. AND one rolled paper tape , which wraps all these twists together - in the form of a single frame - the pink line in the photo below.
You yourself will be pleased with how quickly your homemade New Year's paper star turned out. You can make several of these and hang them on the New Year tree as a decoration.
And using a very similar principle, we can create stars like this. This is also essentially QUILLING. But here the shapes are no longer so smooth and rounded, but more clear and faceted. But the principle is the same.
If you look closely at the photo below, you will see that each of the rays of the star is 2 triangles glued together its longest of three sides.

That is, we cut 10 identical strips of paper. From each we make a paper triangle. We divide all ten triangles into pairs. And we glue each pair together with the long side. We get five rays future star made of paper. Glue the rays together. We cover the center of the gluing with an asterisk. Use a hole punch to make a hole in the top beam so that you can hang it on the tree by a thread.
Craft idea No. 2
New Year's star
FROM toilet paper rolls
And here is the next DIY star idea similar to the previous technique because here, too, round paper loops are glued together. Only the loops here are not glued together from paper strips, but are Cuts from a toilet paper roll– and a transparent colored film (cling film or colored tape) is stretched over each section.
. 
We will need a roll of paper towels or toilet paper. And we will also need multi-colored transparent pieces of film to cover our paper blanks for the star.

Where to get transparent color film for this New Year's star craft.
Option 1 – food grade colored polyethylene.
Option 2 – colored transparent candy wrappers.
Option 3 – colored transparent packaging from bouquets, or gift wrapping in stores with a gift design department.
Option 4 - colored wide tape - sold in construction or finishing stores.
Option 5 - transparent finishing film from a hardware store. It is sold in large rolls, like wallpaper - but they can be bought in any pieces - at least 1 meter, at least 10 cm - cut off from the roll and sold. But first you need to make sure that this film, when separated from the paper base, gives a transparent color - that is, it transmits light. Check it right in the store - peel off a corner of the film from the paper base right on the roll and check it for transparency.
How we will make New Year's transparent stars.
We cut the paper roll into identical ring parts - and bend these parts ray shapes And mid-pentagon for our future star.

To fold the pentagonal center, you need measure the circumference of the roll and divide it into 5 equal parts. And bend in the places marked with a pencil.

And now for every ray of our star we must bend BASE, which in length will coincide with the length of the side of the pentagonal center. To do this, bend the roll along the edge and measure with a ruler half the length of the side of the pentagonal center stars.


Using the same principle, we wrap the remaining rays of the cardboard star in film (or colored tape).

And now our task is to glue all the parts of the star into one - connect the rays with the middle.
The easiest way is a piece of double-sided tape. Scotch tape with sticky edges on both sides.

Or you can spread it with PVA glue and dry it in a pressed form - squeeze it with clothespins

And when assembled, such a star is hung near the window so that it lets in the light and looks like a New Year's glass craft.

By the way.
If you have a glass cutter and colorful pieces of glass left over from old interior doors, then you can make real glass New Year's stars.


Craft idea No. 3
New Year's star
using the VEER technique.
In the photo below we see a six-pointed star made of paper. Even a child can do it in a children's art group. You don’t need to draw anything with a compass or make complex calculations. All you need is 1 square sheet of paper, folded into a fan. And another square of newsprint (smaller in size).


A Master Class How to make such a New Year's star with your own hands looks like this. Fold the square sheet into a fan like this: to make six sides– that is, three folds of the fan only (as in the photo below).
Can I get a sheet right away? measure the width and divide this figure into 6 equal parts. And mark these parts with a pencil and make folds along these marks - then we will get a fan of six identical accordion blades.

And if you make patterned slits in such a star (like in a snowflake), you will get a patterned New Year's star made of paper - with a beautiful openwork pattern on its rays.

That is, we supplement the fan itself (still folded) with slits. And then we stitch the middle of the fan with a staple, fold it in half, unfold it in a circle and glue the blades of the meeting halves together.
Craft idea #4
New Year's star
from twisted triangles.
Here we see a seven-pointed star made of paper. Due to the abundance of rays, it looks more like a snowflake. But if you change the shape of the triangle to a more elongated one, you can get a design with five rays. We place each such tube on a round paper base coated with glue.

Craft idea No. 5
Paper stars
In the form of a garland.
A paper star is often used as an element of a New Year's garland. Here I propose to consider three ways to make such a star garland for the New Year.
Option #1. Here is the easiest and fastest way to put stars on a thread. You need a sewing machine and star silhouettes cut out of cardboard.
Thread the thread into the sewing machine, place a star under the machine foot and machine stitch through the star. Moreover, when the line reaches the edge of the star, we do not stop the machine but continue to sew to get a long thread twisted into the line. After a few centimeters of such an empty chain line, we again place a cardboard star.

Option #2. You can make a garland of voluminous stars using the same principle. They are made according to the krishka principle - several star silhouettes made of paper are placed on top of each other and fastened with a common machine seam. Or first you can staple these multi-layer stars.

For a garland of paper stars, it is not at all necessary to buy colored paper. You can use pages from old books or a sheet music.

Option #3.
Or you can make a garland of voluminous stars with smoothed edges. If you make holes in such paper stars with a hole punch, then you can stretch the thread through them and we will get a starry New Year's garland.

Here is a clear master class that clearly shows how to make such a three-dimensional 3D star from cardboard with your own hands. As we can see, with a sharp stick under the ruler we iron the arrows of the star. And then the ironed lines will easily bend into the convex folds we need. And we will get a star with faceted rays.

We bend those lines that lead from the center to the tip of the beam outward. And we bend the lines that lead from the center to the interradial point inward.
Craft idea #6
New Year's star
with smoothed edges.
But below is another simple way to make a star out of paper. Here you need a template (the star drawing itself) and a ruler with which we will smooth out equal folds of each face of such a star.
Look at the picture and you will see that this is a simple flat six-pointed star. It was cut out from a flat sheet of paper. And then each edge was bent - in sequence we bend one edge outward, and bend the next edge inward.
To draw a six-pointed star on paper yourself, you can use ruler or compass. First, we measure the distance from the middle of the circle to its edge (that is, we find out the radius of the circle). And then we measure this radius along the entire circumference with a ruler or compass. Only six of these radii can fit along the entire circle. These marks will be the points of the rays of our star with six rays.
Or you can use the ready-made stencil in the picture below. You can trace it directly from your computer screen, just place a piece of paper on the glowing screen - the star will shine through the paper - and use light pencil lines to trace the outlines (or just the corner points). And then remove the sheet from the screen and circle everything with a bold line.

If you want to increase or decrease size pictures on the screen, this can be done using the buttons of your computer.
Press the button with your left hand Ctrl on your keyboard (it's on the bottom row on the left) - and while the button is pressed, you use your right hand turn the mouse wheel- forward to increase, back to decrease. And the size of all pictures on the screen changes, increasing or decreasing.
Craft idea No. 7
New Year's star
From paper modules.
But here is a star made of paper, which is folded by connecting individual paper modules together. How exactly to fold such a star out of paper is shown in detail in the diagram below.

These paper New Year stars can be made as independent Christmas tree decorations. As a decorative star for New Year's decorations. Or you can dot a ring for an Advent wreath with these paper stars.

Craft idea #8
New Year's star
From cardboard.
Here's a simple craft volumetric New Year's star, made of cardboard. Here (as you see in the photo) you need to cut out two identical silhouettes of a five-pointed star from cardboard.

After in each make a cardboard star cut with scissors - in a straight line, leading from the lower interbeam to the upper apex of the beam - but don’t finish it to the end, and stop at the central point of the star.

When we we place one slot on the slot of the second cardboard star– we get a cross-shaped connection of two strips (perpendicular to each other). In the end it turns out 3D star.
Here's an option when 2 stars, also cut out of thick cardboard, do not fit on top of each other - but simply lie on top of each other so that the rays of the upper star are located between the rays of the lower star. If you make openwork slits in such a cardboard star with a blade, the star will look more elegant. And the gold sprinkles will make such a New Year's star completely festive.

Craft idea No. 9
Cardboard stars
DOUBLE SIDED.
Method 1 – four-beam blank
You can make a star with four rays out of paper - then make the same second one and connect them together.

Here is a detailed master class describing how to make 2 blanks with your own hands and connect them together into one star.
Method 1 – three-beam blank.
And these three-dimensional paper stars are also made from two modules, glued one to the other. Only here the module is not made of four beams, but of three.

In flat form, this module has this triangular shape with notches and fasteners on all three sides.

We bend the module along the longitudinal line of each of the three corners of the triangle. The cut modules are placed on top of each other using notch-serifs. And it turns out a three-dimensional star with six rays.

Craft idea #10
Paper stars
Using ORIGAMI technique
You can make a star using the origami technique. That is, from an ordinary square sheet of paper WITHOUT USING SCISSORS. This is what distinguishes the fashionable Japanese technique of origami - the art of transforming a square plane into a figure of any complexity.
This star is also obtained from one square sheet of paper. But the process looks quite complicated. But once you understand it, you understand the speed and ease with which these stars appear. And having made 4 such stars, you acquire high-speed automation and can add stars almost blindly.

Here is another star made using the origami technique. Where a paper module is made from a square sheet. And from such ray modules we create a solid star made of paper.
Craft idea No. 11
New Year's stars
Transparent for the window.
You can make a star out of paper to stick it on the window. Such stars look very elegant. And this is an alternative to the classic paper snowflakes that we are all used to gluing to windows during the Christmas holidays.

Making such a New Year's star out of paper is quite simple. A strip of paper is folded in half. Its ends are curved to give it a pointed shape. We attach the resulting module to a round base sheet. Or we immediately attach it to the window - to an imaginary circle.

Depending on the shape of the folds we made to give the pointed shape to our rectangle, we will get different shapes of the star's rays. Thus, by showing some EXPERIMENTAL creativity, we will be able to create more and more designer New Year’s stars for the window.

Craft idea No. 12
New Year's stars
from a rolled newspaper.
And here is another star made of paper - or rather, from a sheet of newspaper. Here a thin twist is made from a newspaper spread. You can place copper wire inside the twisted newspaper - this will give additional rigidity to the bent star frame.

After this, the blank star from the newspaper can be decorated. Paint it with paint, wrap it with thread, coat it with glue and cover it with glitter. Or something else according to your imagination.

These are the ideas I have collected for you in this article. Now you know quite a lot of ways to make a star out of paper with your mind and your own hands.
Olga Klishevskaya, especially for the site ""
If you like our site, you can support the enthusiasm of those who work for you.
Happy New Year to the author of this article, Olga Klishevskaya.
How to decorate your home before the holiday, add solemnity and taste to its atmosphere? The easiest and most creative way is to make your own paper garlands. Today there is nothing easier than making jewelry yourself. Even a junior schoolchild can cope with this. On this page you will find a variety of designs for making thematic garlands, as well as interesting templates with which you can cut out an innumerable number of decorations for your home and office.
Paper garlands “Rainbow made of ribbons”

You can hang this garland both vertically and horizontally. In the latter case, it is better to attach a weight, such as plasticine, to the end of the thread.
1. Fold the colored paper in half and cut the halves.
2. Cut strips of colored paper.

3. Prepare the thread and fold your strips in the desired sequence.
4. Sew all the strips together using a sewing machine or thread and needle.

*You can twist the ribbon to make the garland look “fluffy”.
* Colored paper or cardboard can be replaced with wrapping paper, which is usually used to wrap gifts.
* If you don't want to stitch, you can try gluing a thread to each strip - it will take more time and it would be better if the thread was thicker.
Standard garland “Snake”
Even the smallest children, who have barely learned to hold scissors in their hands, can handle making snakes. So, if you have kids, keep them occupied with “snakes” and get down to more complex work yourself.
Manufacturing technique: Cut out a large circle from paper and, stepping back a centimeter or two from the edge, begin to cut the ribbon (see photo) until you reach the center. If you still entrust this simple task to a child, it is better to draw in advance with a pencil the lines along which he should cut - this will make the child’s work easier.

Garland “And they dry on a string...”
How do you like this idea: in the middle of the room there is a clothesline, on which old Santa and his faithful reindeer have hung their holiday outfits to dry: red caps, mittens, boots with bells, big pants, a bag... First you will have to sew miniature clothes (you can, of course, get them similar in toy stores, but it will be more expensive), and then secure them with small clothespins (you can use large ones, of course). If you don’t want to bother for a long time, hang your mittens or colorful socks to dry. Or you can have both mixed together. You can simply cut out multi-colored boots from felt or paper and string them on a thread.

How to make a garland "New Year's rings"

This method of making a garland is one of the most popular. This is not only because it is quite simple, but also because it allows you to make beautiful paper decorations for your home, and in particular for your Christmas tree.
1. Prepare colored paper and measure the same width for the strips you will cut.
2. Start cutting out strips. The length of each will be equal to the width of a sheet of paper (i.e. 21 cm) and the width is approximately 3.5 cm.

* You can make a garland from shorter and narrower strips, then the rings will be smaller.
3. Glue the strips together by threading one through the other (see picture).

*You can close the circuit.
Garland “Volume Stars”
Such stars can easily be spun from paper strips one to two centimeters wide. Carefully study the photo instructions and go ahead!


Paper Christmas garlands “Unusual chains”
Prepare colored paper, scissors and glue. Making such a garland is not difficult.
1. To make an unusual chain, you need to fold a sheet of paper in half and draw, for example, one of the shapes shown in the picture.

* In order not to waste a whole sheet of paper on one link, you can cut it into 2 or 4 identical parts, from which you will then cut out the links.
* For convenience, you can make a link template.

2. Cut out the shapes and start gluing them together to form a chain, threading one link through the other.
*The longer you want to make the chain, the more links you will need.
*You can use many different colors to make the garland even more colorful.
How to make a “Chain” garland for home decoration from paper
You can use 2 or more colors.

1. First you need to make a blank. Cut several strips of the same size. In the picture, the stripes are 2 cm wide and 17 cm long.
* It is advisable that you observe the following condition: width/length of strips = 1/8 + 1 cm spare.
2. Mark the center of the strip by folding it in half and then spreading it out.
3. Bend the ends of the strip towards its middle and fold the strip in half again.
4. Prepare several of these blanks to start assembling the garland. The picture shows how to stack the blanks together.

* This garland can be hung on the wall. Due to the fact that it does not bend much, it will be difficult to hang it on the Christmas tree, but it still looks impressive.
Garland of hearts

The pictures contain detailed instructions on how to assemble the garland cordially.


This version of the garland can be complicated, and you will get such a beautiful product.

Garlands for the New Year “Colorful home decoration”

You can use colored paper to make this colorful decoration for your home. It is suitable for both the New Year and any children's holiday.
Prepare colored paper, scissors and glue (you can replace it with a stapler or tape).
The picture shows how to make the blanks.
* It is desirable that the strips have the same width.

Use glue, a stapler or tape to hold the pieces together.
Using the same technology you can make a garland like this. And you can find out how to do everything correctly from the video below the picture.

Volumetric New Year's garland

Here is a fairly simple but very original idea for a garland that can be hung on a window or just somewhere in the house.
The images show step-by-step instructions on how to make a garland.
* In the Christmas tree, the hole through which the thread is threaded is made with a hole punch.


Christmas tree garland “Merry candy wrappers”

Very beautiful tinsel can be made from ordinary candy wrappers.
1. Cut the candy wrapper into several identical pieces.

*Parts can be 2x4 or 3x5, and depending on the size of the wrapper, there can be 3, 4 or 6 parts.
* For convenience, you can make a template that will help make all parts of the tinsel the same size.
2. Start twisting each rectangle into a tube, but do not let go so that it does not unroll.

3. Prepare a thick thread with a needle and start stringing the tubes one by one. The edges of the tubes turn around - this is good, because... the tinsel will turn out fluffy.

4. You can make a knot at the end of the thread so that the tubes do not jump off.
* After stringing all the tubes, turn them in different directions.

New Year's garlands made of paper using the Origami technique

1. We make preparations. For one step of the garland you will need 2 strips of different shades.
* The length of one strip is 21 cm (which is the width of a regular A4 sheet), and the width is 3.5 cm.

2. Start folding the strips sequentially as shown in the picture.

*The final goal is to make two long ribbons that will form a rainbow.
3. We connect the end of one tape to the other at an angle of 90 degrees.

4. Continue folding the strips sequentially - vertical down, horizontal across.
* The circuit can be closed if desired.
Garlands for the New Year (several examples)


Amazing paper garlands
Perhaps the simplest and most popular New Year's garlands that can be made at home, even with the involvement of a child, are paper garlands. For these purposes, it can be used in a wide variety of ways, ranging from ordinary colored sheets to openwork napkins and multi-colored adhesive tapes.

Such decorations are even made in kindergartens and elementary grades, so anyone can handle them. So, you will need paper, scissors and glue. Sheets of paper are cut into strips of equal width (to make this easier, divide the paper in advance using a ruler and pencil).

The cut strips are glued together into one common garland according to the principle of a regular chain, which consists of links. To get something more original, try playing with the shape of the links: making them square or even voluminous, although this will be a little more difficult. It can be made even simpler: colored paper is cut into thin strips, and then they need to be sewn together in the center; usually a machine is used for these purposes, but you can do it manually.

The stripes can be replaced with circles, triangles or any other shapes that come to your mind. By the way, you can use bright felt instead of paper; such products will be more durable. Such decorations, by the way, look very impressive in door or window openings in a vertical position.
Exquisite garlands of snowflakes
One of the main symbols of the New Year is, of course, snowflakes. So why not use them to decorate your own home? Probably each of us remembers from childhood how to cut out beautiful and delicate snowflakes. The more cutouts, the more sophisticated the snowflake will be; by the way, especially for this purpose on the Internet you can find a whole lot of patterns that will help you make many different figures.

Next, we connect each snowflake using a regular thread or silver rain, and then hang it from the ceiling. By the way, such decorations will look more beautiful if there are a lot of them, so it is better to make 5-10 of these garlands, depending on the purpose and place of use.

Garlands made from natural materials
Why throw away tangerine or orange peels when they can easily be used as scrap materials? We cut out cute shapes from the peel, for example, hearts, stars, faces, snowmen, and so on.

Then, using a needle, we string them onto a thread and our decoration is ready! By the way, it will not only transform your home, but will also spread a pleasant citrus aroma throughout it. Instead of peels, you can use apples and ordinary fir cones; sometimes they are painted in some unusual color or simply put on a thread in their natural form.
The easiest ways to make paper garlands
 It doesn't take much time or effort to decorate your apartment with intricate and whimsical paper decorations. Paper garlands are lightweight and durable, beautiful and affordable. We will tell you about the simplest ways to make garlands that will decorate your life and lift your spirits.
- Templates. To make your work easier, you can use blanks: simply print them and cut them out from a simple landscape sheet of paper.
 These are the New Year's templates you can print and make your own garland.

2. Drawings. If you have basic artistic skills, you can fold a piece of paper several times and then draw the picture you want on it.

3. Garlands of snowflakes. Delicate lace decorations made from plain paper are easy! Use templates or make your own design.

 Use templates to make snowflakes or just use your imagination.

As you have already noticed, there are a lot of ideas, the main thing is to connect the desire to create and, of course, your imagination, which will help you create the most unusual and unique New Year's garlands!
2016-11-25The joy of the upcoming holidays can be complemented by a hand-made paper garland for the New Year. Today we will be making this decoration. I made a small selection with photos of different options. I hope you enjoy the collection and find something that suits you.
I’ll roughly divide the crafts into simple ribbons and those with pendants.
And yet, it is worth adding that in most models the choice of color and size, both of the entire garland and its individual parts, is yours. You can decide for yourself whether it will be a combined type or consisting of identical parts.
Chains and ribbons
Stars of happiness
Very beautiful garlands are made from stars of happiness.
Watch how to do it in our video.
Chain
The simplest model that even a child can make with his own hands. But its simplicity is brilliant, because it is the rings of the chain that are so convenient for hanging toys. 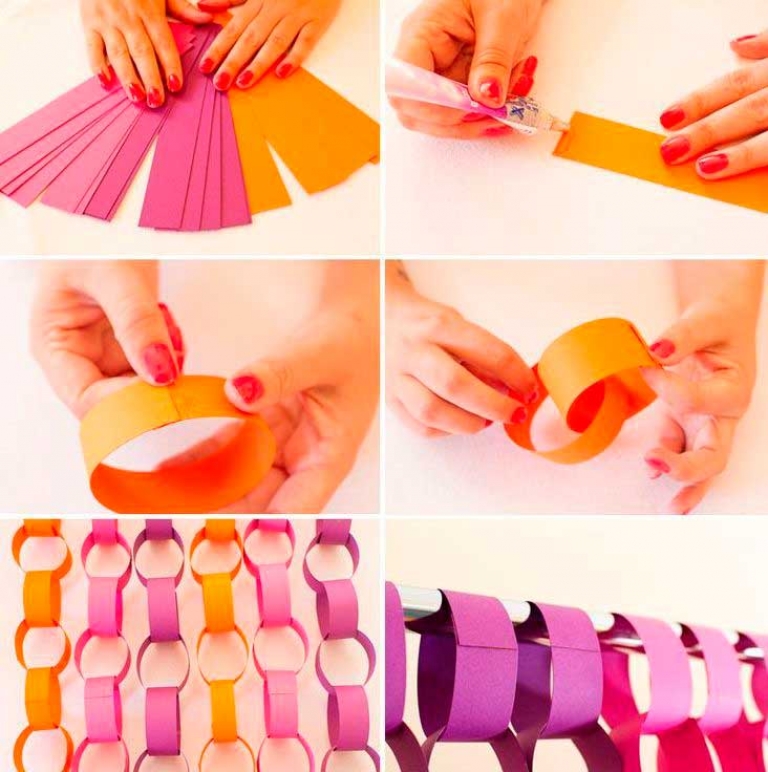
- Cut colorful paper into strips.
- Glue the edges of the first strip together to make a ring. This is a link in the chain.
- We thread the second strip into the link and fix the ends again. And so on until the end!
It looks nice if the links are made in different colors.
Fan
The trusty garland looks very beautiful and is easy to make.

Garland of men

Fold a long strip like an accordion and cut it according to the template:


And here are some beautiful couples:


Snowflakes
 Garland of snowflakes
 It's simple! We cut all kinds of snowflakes and glue them to a string!
Using the same scheme, you can make “snowmen”, “Christmas trees”, “stars” and even voluminous snowflakes 
And even pigs look good 
More boots

Templates for garlands enlarge by click:


Light bulbs

Light bulbs can be made flat, as in the version with snowflakes, or more voluminous, like a garland of rings.
For a flat garland, cut out the light bulb according to the template, paint over the base or use black tape instead, and draw a spring if desired. 
For volumetric you need strips 1.5-2 cm wide, 20 cm long, and short strips 3 cm wide for the base.

Balloons

The choice of color and size is yours

The second option for gluing the balls is to coat the entire rug with glue, but only in spots.
 Volumetric paper balls
 Snowmen are made using the same scheme. For a snowman we will need 2-3 sets of larger and smaller sized balls. 
You can also make butterflies, snowflakes, hearts.

Lampandina

Again a garland of light bulbs - lanterns. But here you need to work hard. We print the template on colored paper (you can simply circle it on one sheet and then cut it out in a bunch) and cut it out. Fold as shown in the picture. 
Volumetric

This miracle looks as if professionals worked on it. In fact, such a volumetric design is very simple!

It looks very nice if you use several colors for design. 
From paper tartlets

Fold the paper form into quarters. 
We put three triangles on top of each other and glue them together, forming a Christmas tree.

Chinese lanterns
There are 2 options! For the first we will use diagrams, for the second we need a basis.
Flashlight

If you take templates like in the picture, you will get an “octopus”.


We glue the legs of this “flashlight” together.  All! You can string it on a thin rope!
Flashlight

These are lanterns from my childhood!
The base can be a ribbon, a paper towel cartridge, or just a thick base around the edges. 
And yet, the flashlight itself can be made from thin corrugated paper.


By the way, the second option is more suitable for pendants. Let's talk about them now!
Garlands with crafts
Pendants can be simple Christmas tree decorations or beautiful crafts you have made. I will offer interesting but simple options for children.
Christmas trees

To get such openwork Christmas trees, you need:

Looks very cool! 
Garland pig

Of course, what decoration would be without the symbol of 2019 – Pigs?!

But you can simply cut out identical figures according to the template and hang them on a string. Looks great too!
Piggies

These are the pigs my son and I came up with to hang on a string. We did two today, we’ll continue tomorrow.
It's very easy to do. Cut the A4 sheet in half lengthwise and fold two accordions. We fold each accordion in half and get a round fan.

Glue on the nickel, eyes and ears. 
Boots

Practical garland. You can put candy or a small gift in each boot
Basic template 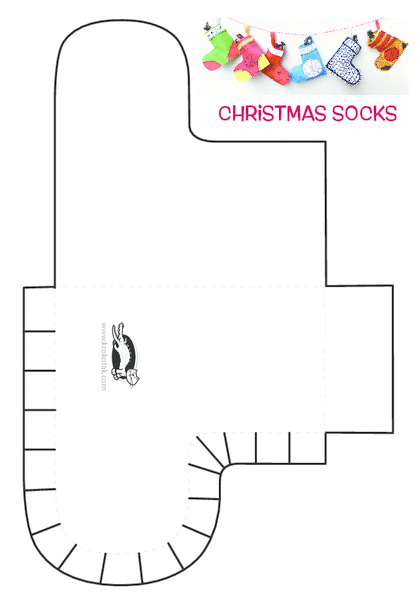
Step by step video
Sweets
Also an interesting idea - candies filled with candies))) 
Angels
From threads